Manage marketing sources
Keep a clean list of the places your leads come from, so every opt-in is matched to the right source and paid traffic is reported correctly.
A marketing source is a place your leads come from, such as a webinar, your website or Meta ads. Hermon uses the list to label each lead with a First Source and a Last Source, and to split your dashboard numbers by source.
Each source has a name, one or more aliases and a mark for paid traffic. The aliases do the matching: when an opt-in arrives, Hermon compares its UTM source with the names and aliases in this list.
Before you start
You need the Owner or Sales Manager role. Other roles do not see Marketing Source in the menu.
Create a source
Open Marketing Source
Click Settings in the left sidebar, then Marketing Source.
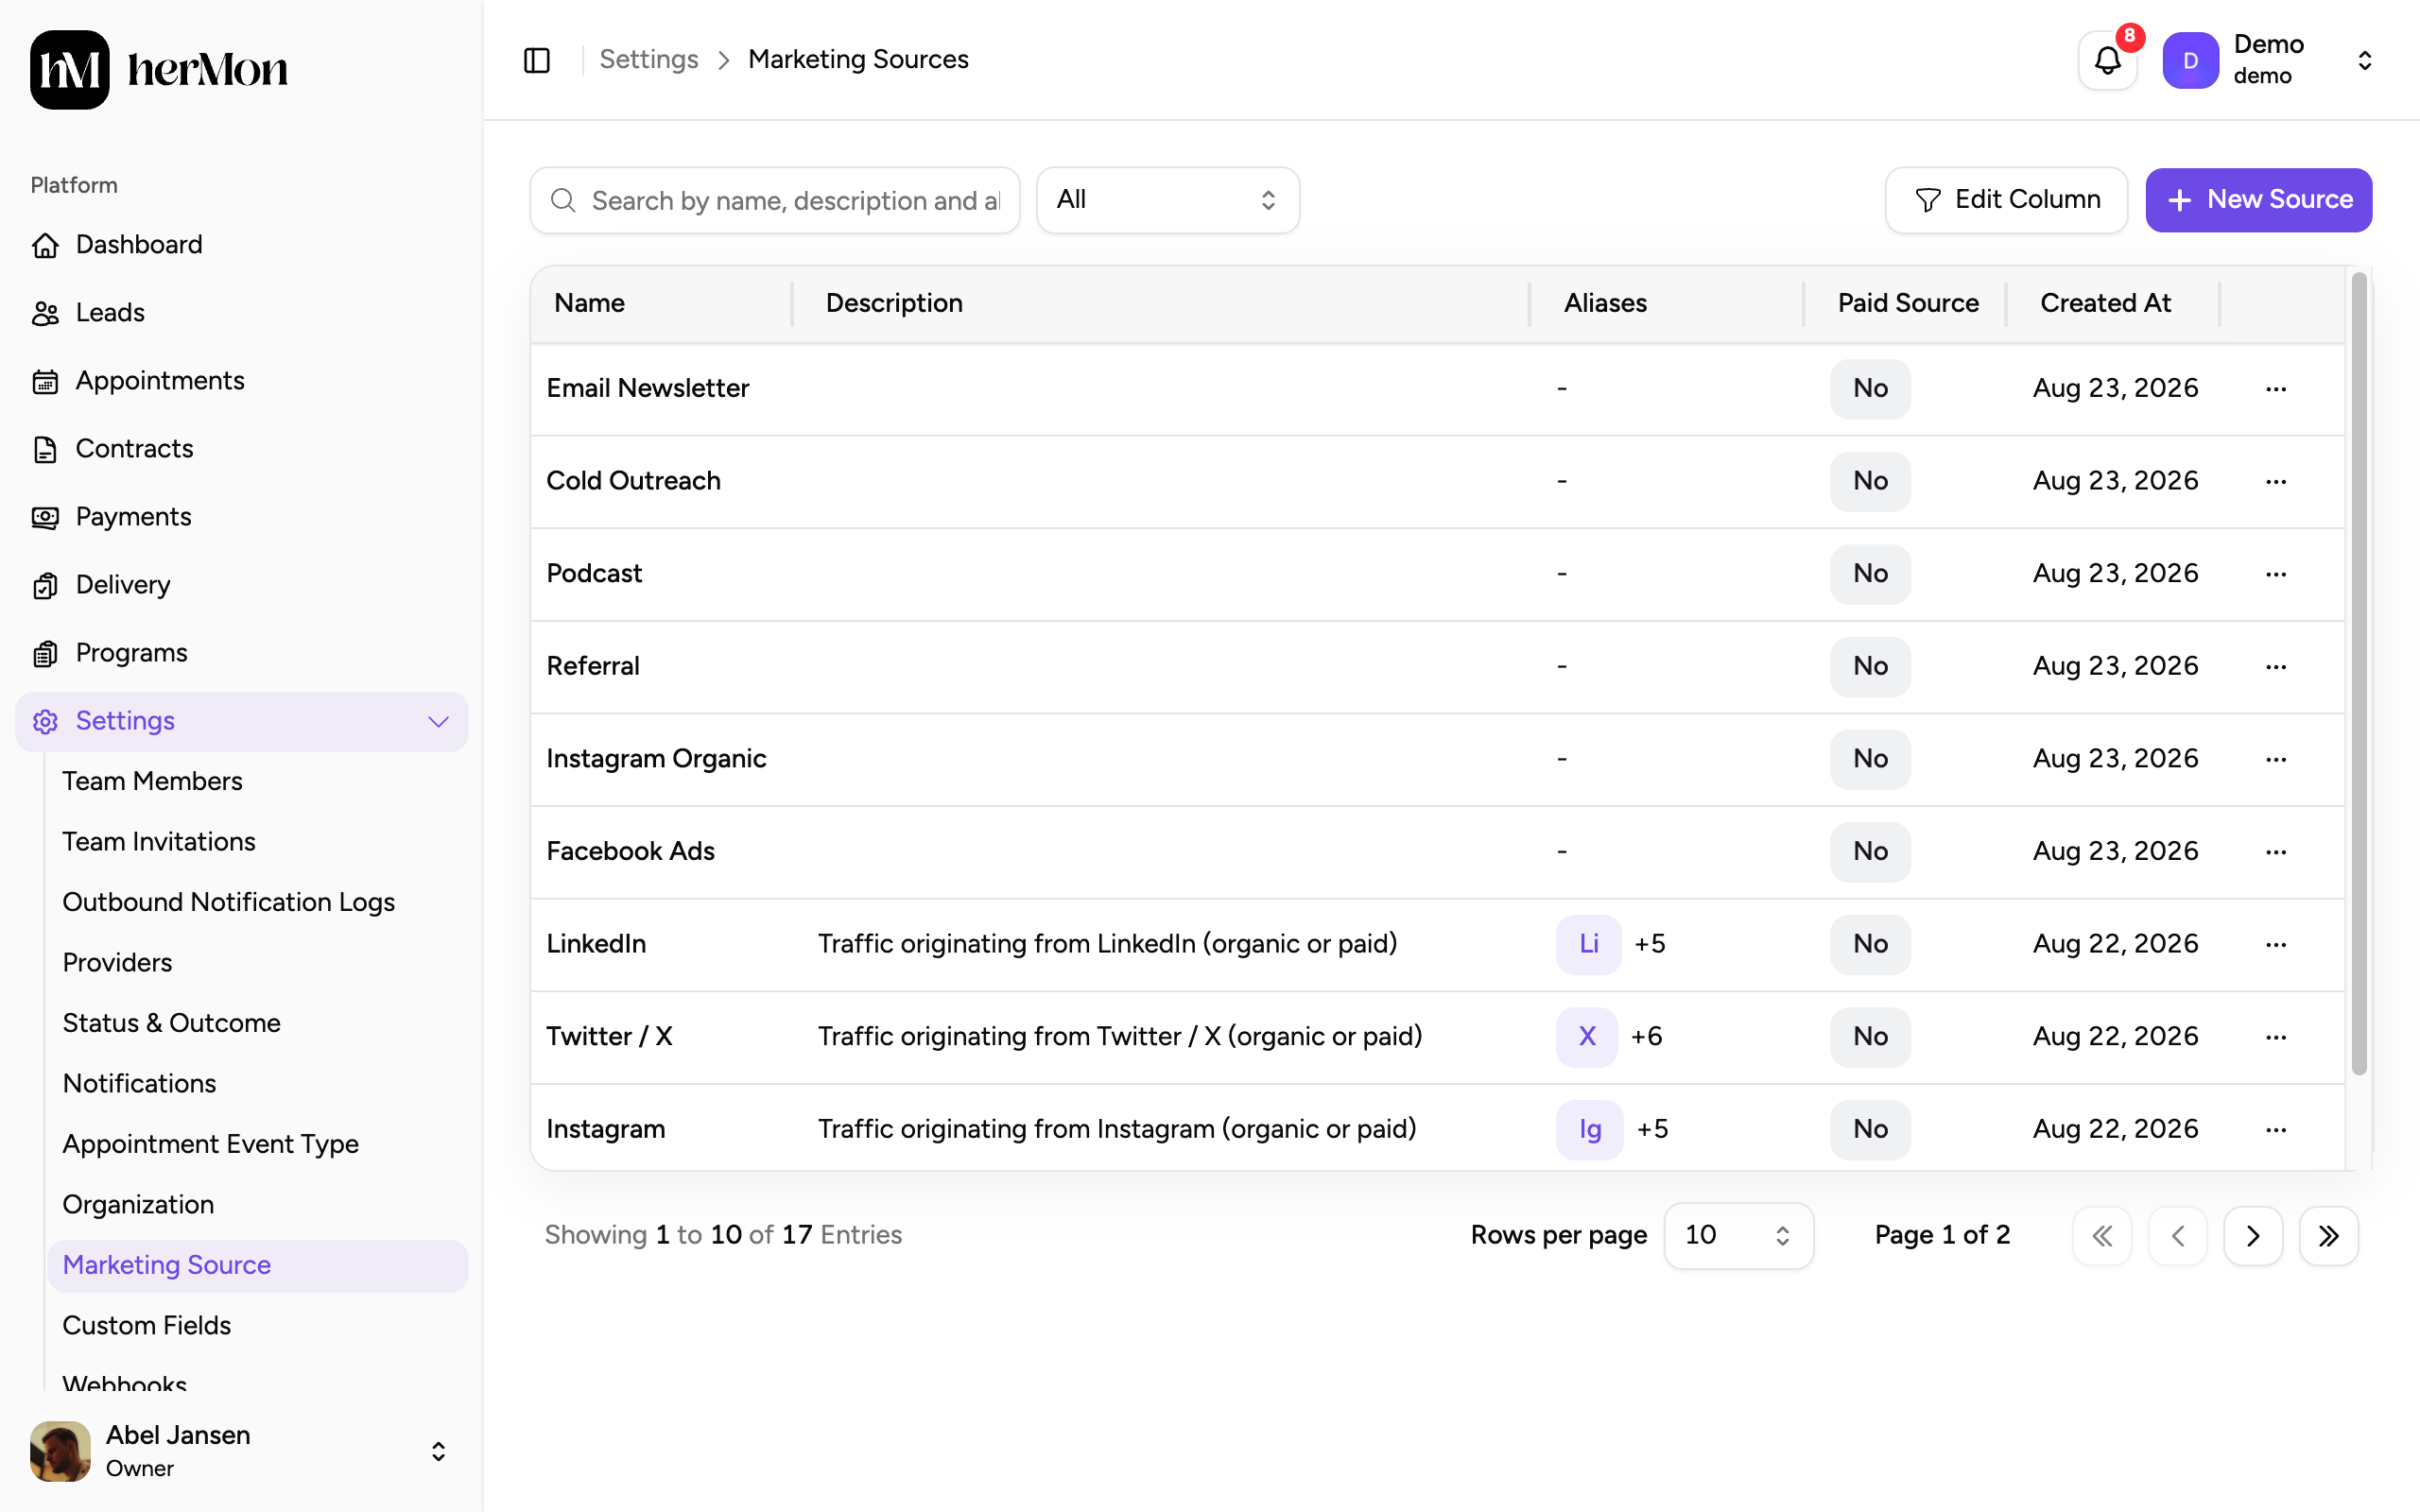
1. New Source. 2. The aliases of each source. 3. Paid or not. Click New Source
The Create Marketing Source dialog opens.
Name the source
Enter a Name of 2 to 50 characters, using letters and numbers. Add a Description of up to 200 characters if the name needs explaining.
Add the aliases
In Aliases (comma separated), enter every spelling that can arrive as a UTM source, separated by commas. For example:
webinar, website, wb. At least one alias is required and each can be up to 50 characters.Mark paid traffic
Tick Paid source if you pay for this traffic, for example ads. Leave it unticked for organic sources such as a newsletter or referrals.
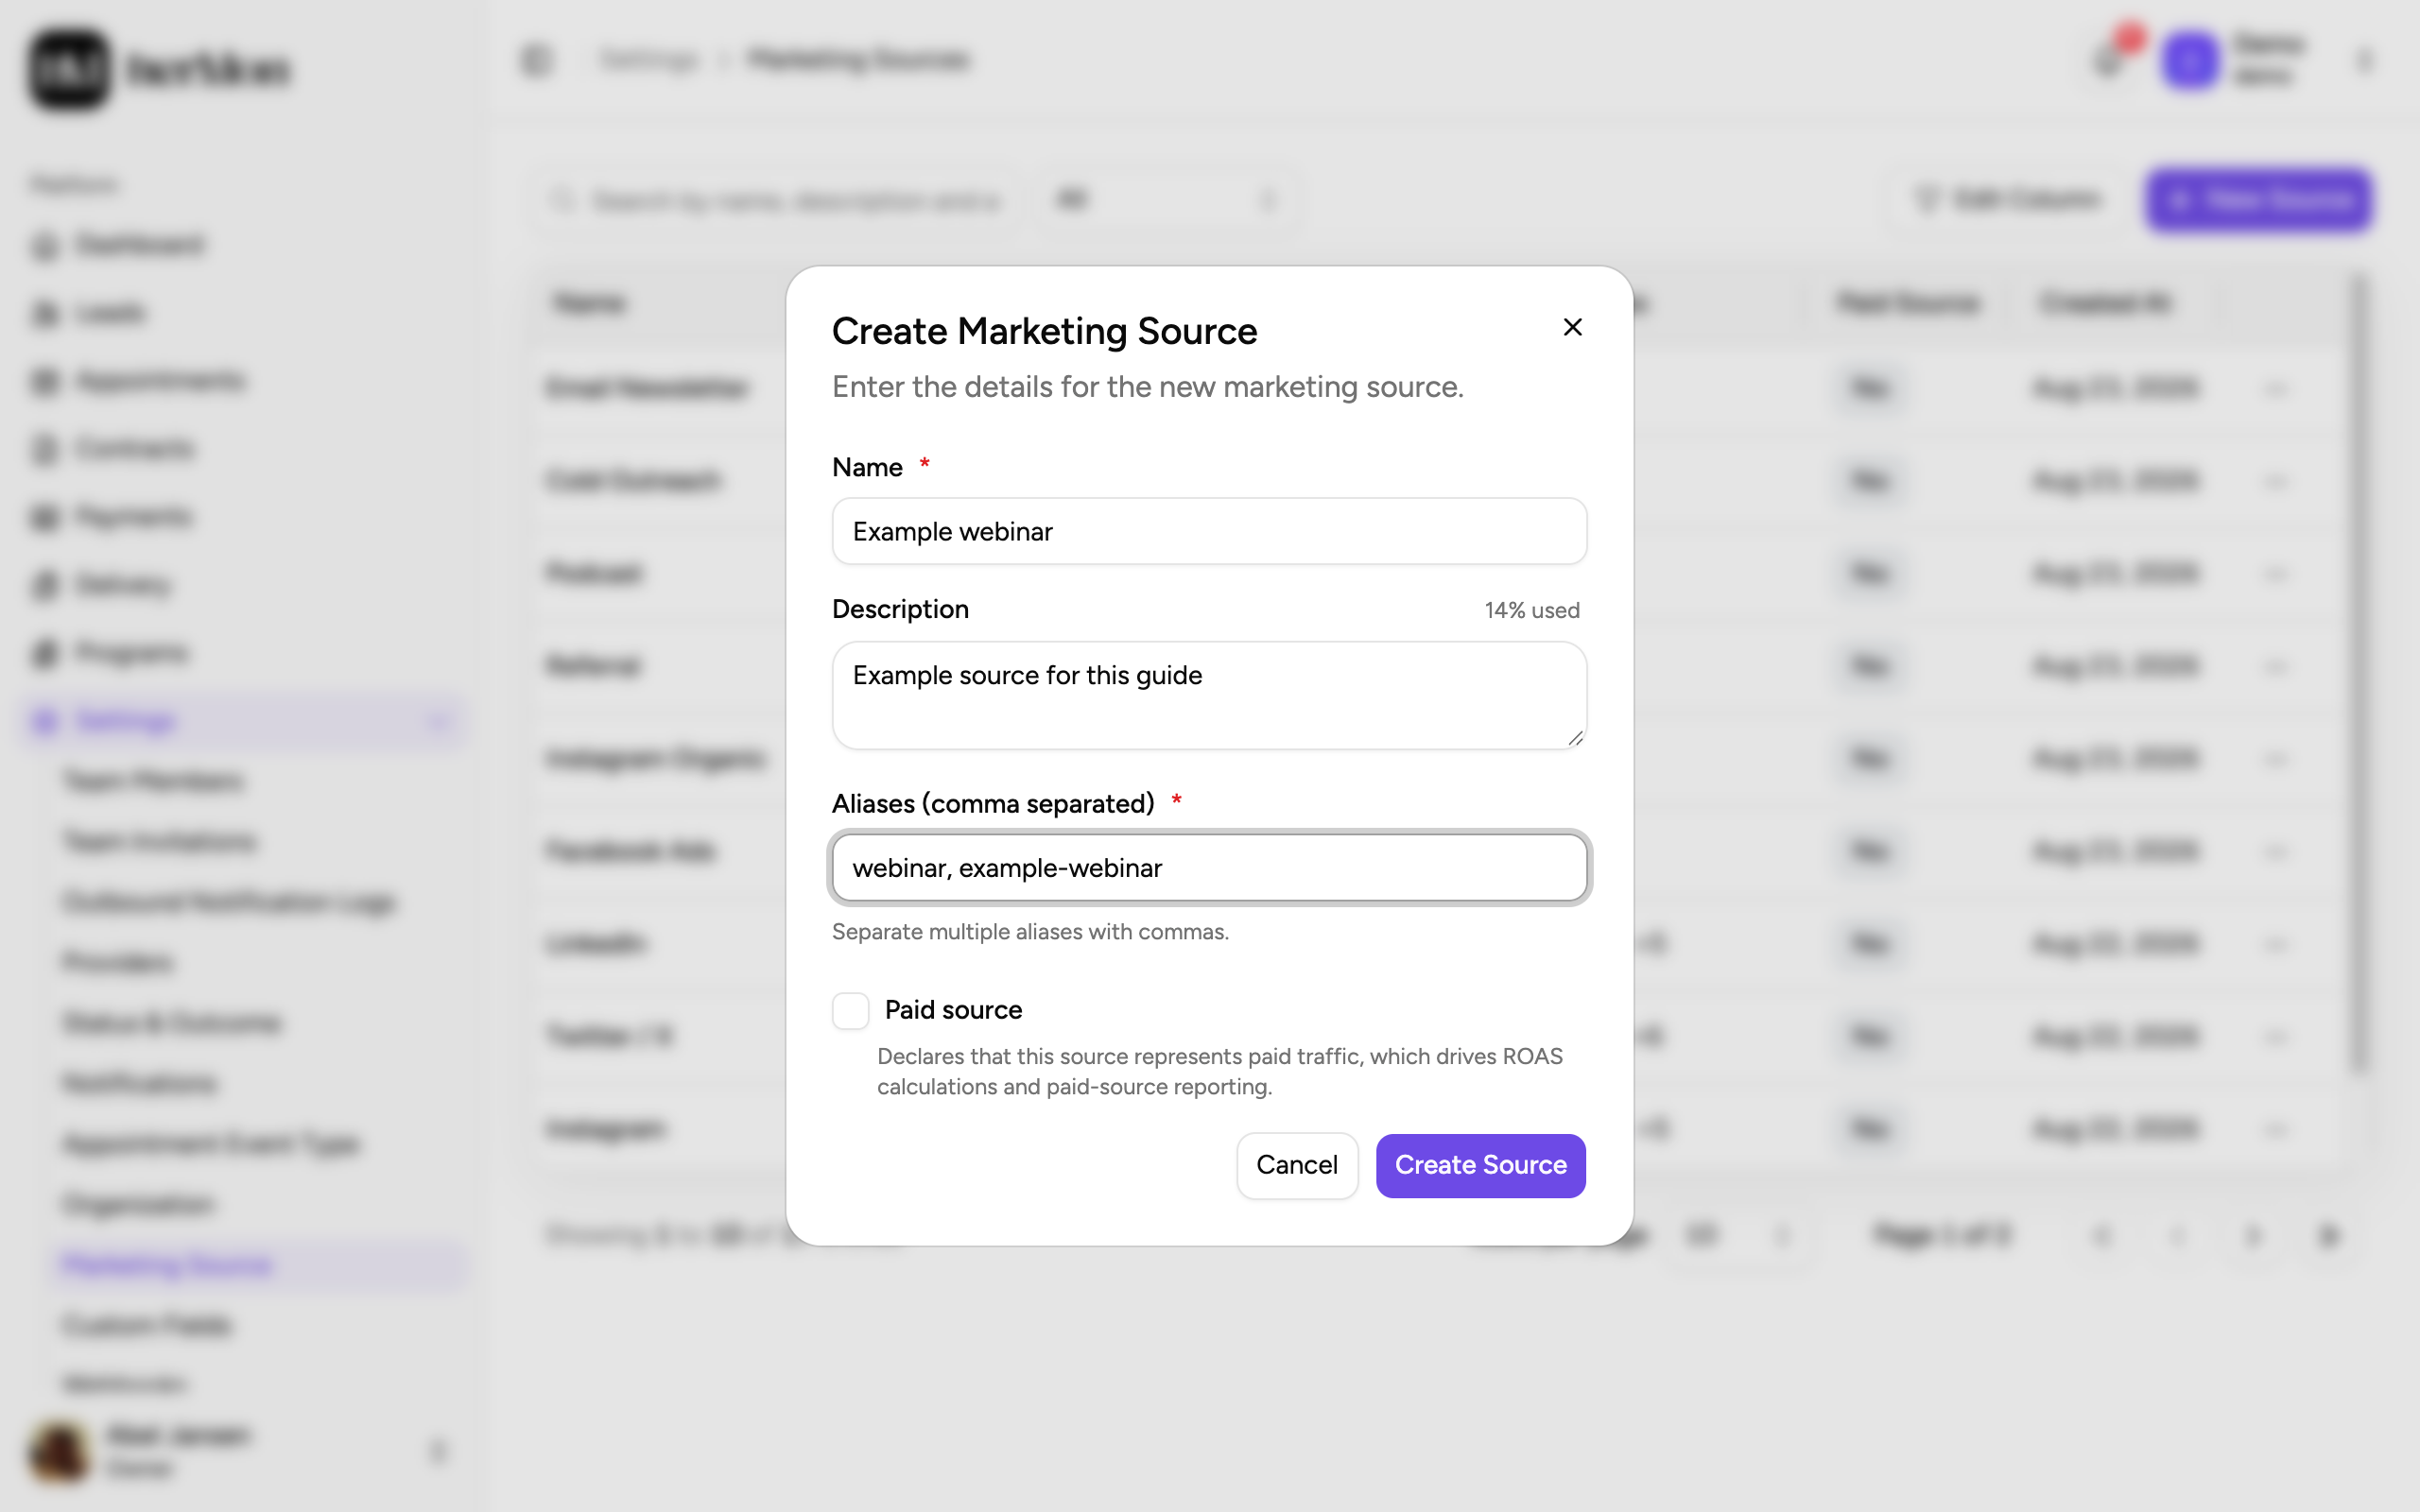
1. Aliases, separated by commas. 2. Paid source. Save
Click Create Source.
Paid or organic
| Paid source ticked | Paid source not ticked | |
|---|---|---|
| Use for | Meta ads and other advertising you pay for | Newsletter, organic social, referrals, your website |
| Shown in the list as | Yes | No |
| Effect | Counts as paid traffic in return on ad spend and paid-source reporting | Left out of paid reporting |
Leads from a paid source are expected to match a Meta campaign. If they arrive without campaign details, the dashboard lists them as unmatched paid leads. See Capture opt-ins and track UTMs for the parameters to put on your ads.
Edit a source
Click the three dots at the end of a row and choose Edit. The Update Marketing Source dialog opens with the current values. Change what you need and click Update Source.
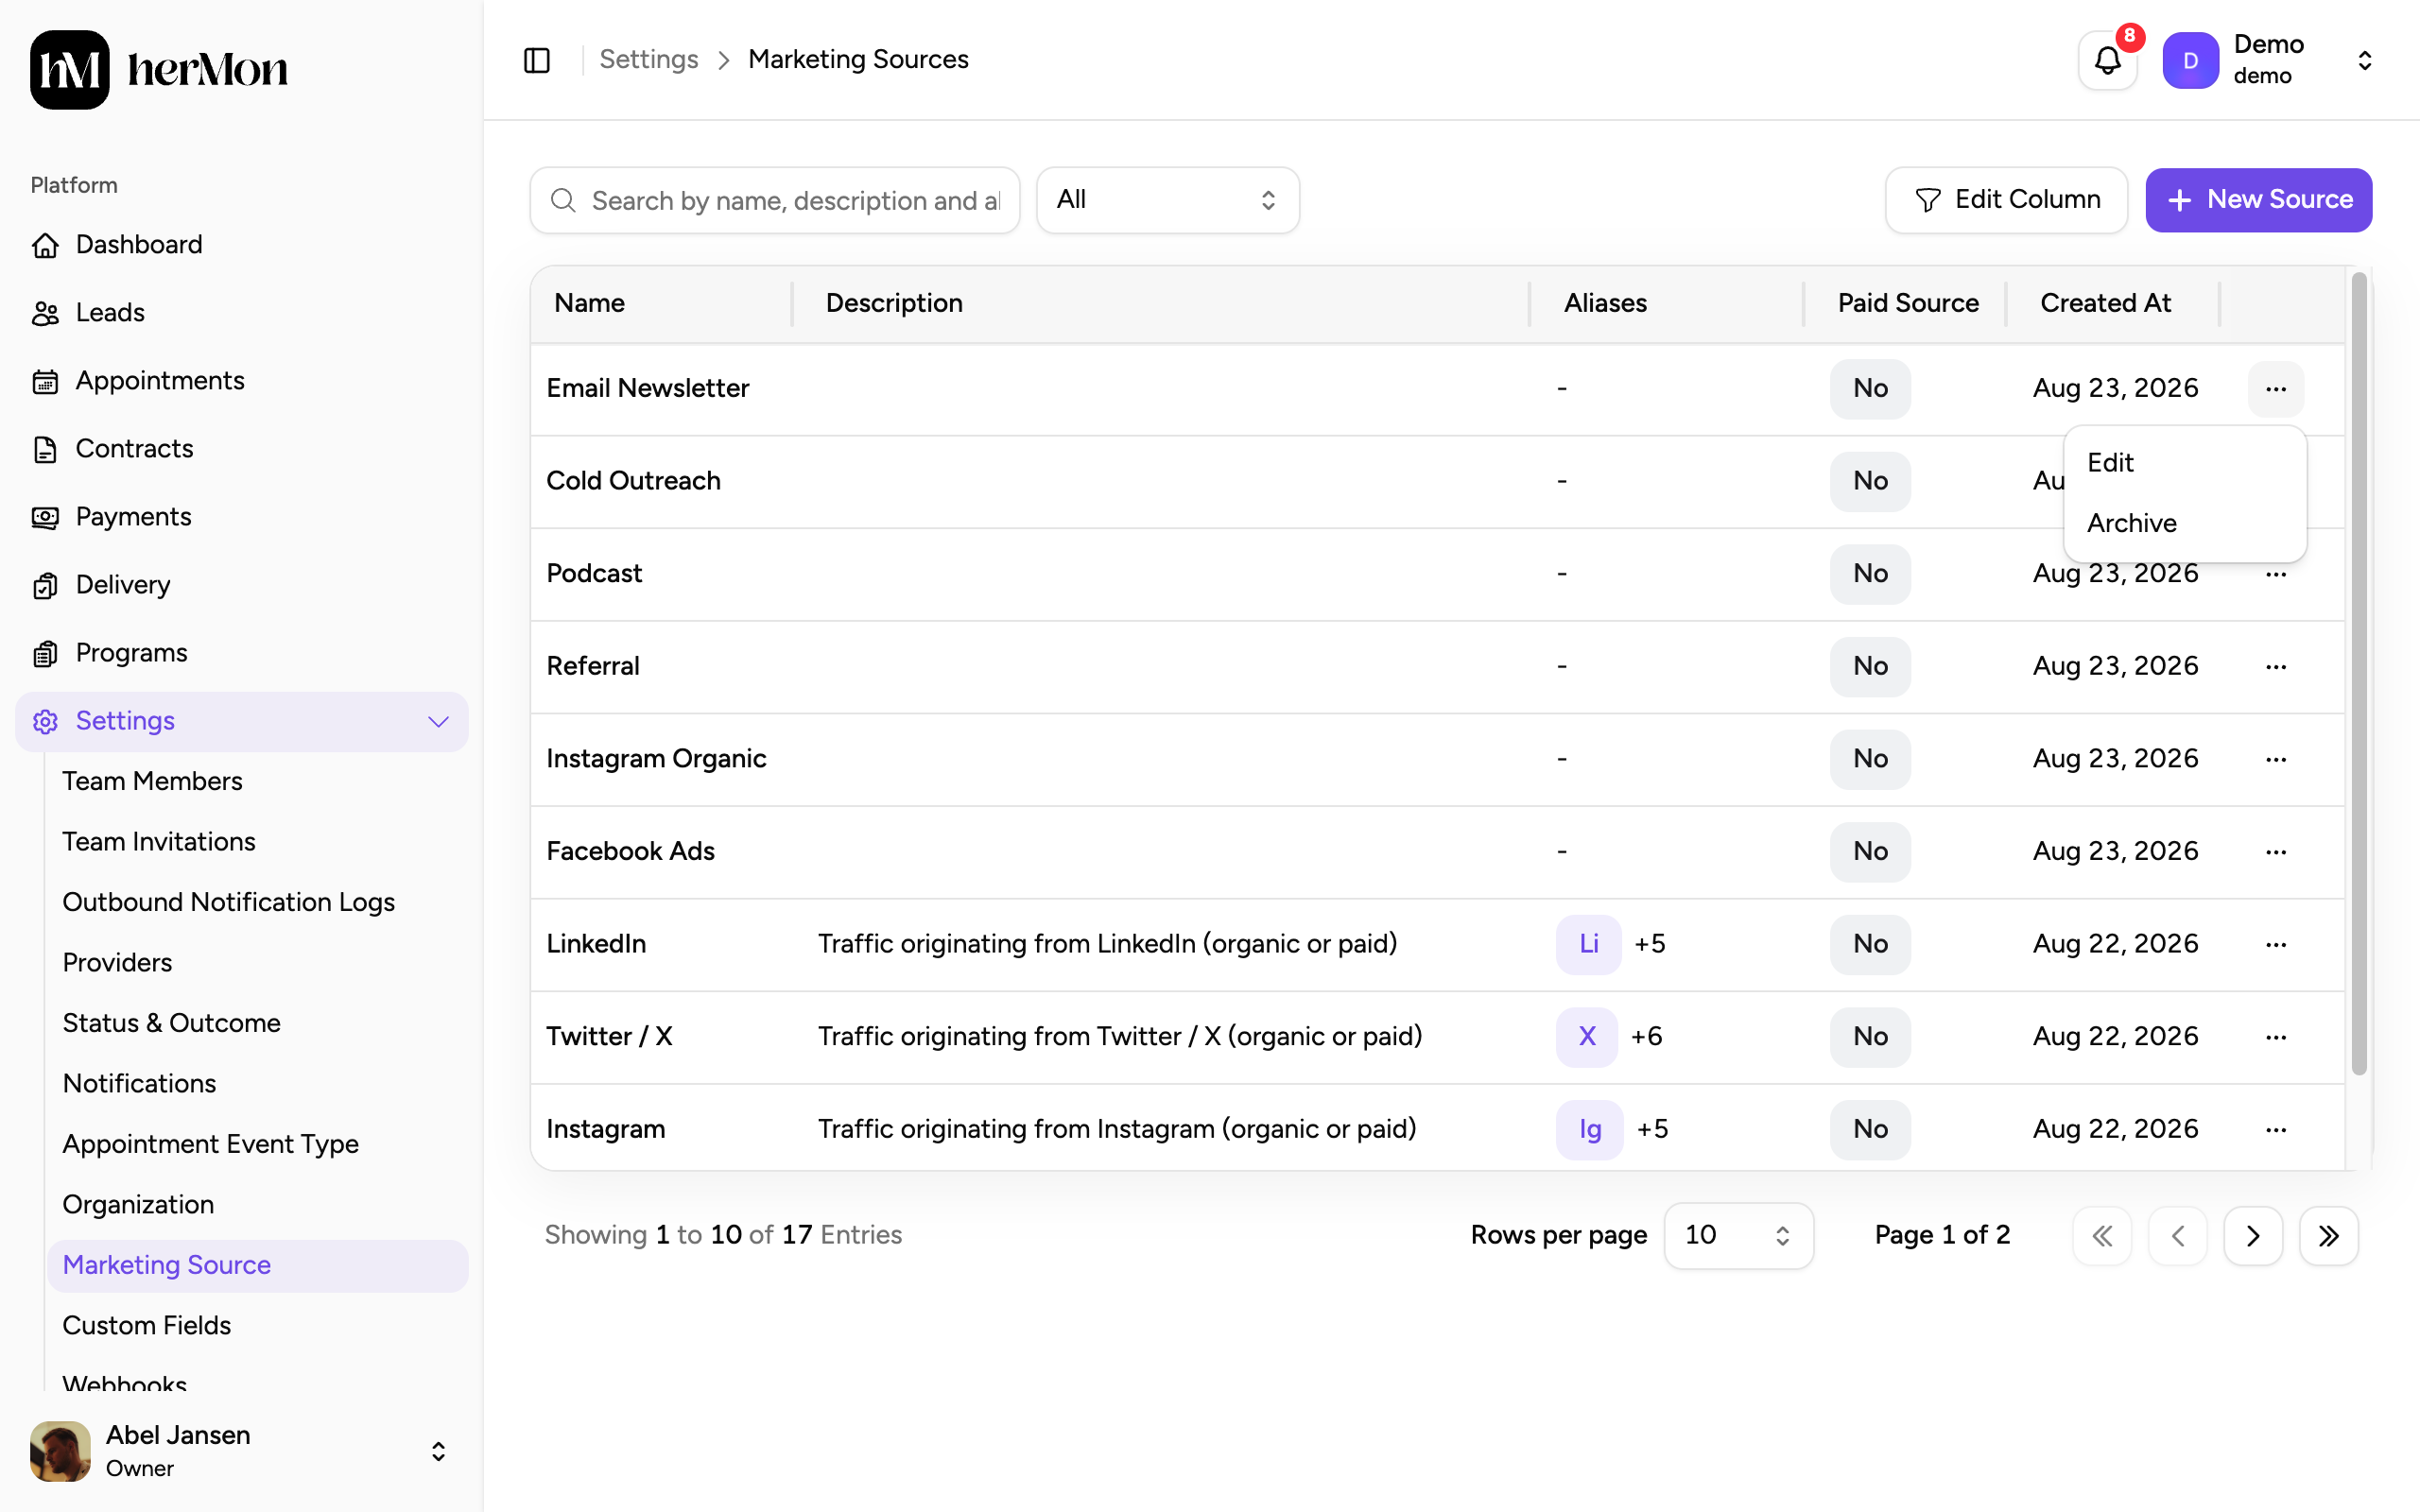
The most common edit is adding an alias. If leads arrive with a UTM source that is spelled differently from what you expected, add that spelling to the aliases of the right source.
Archive a source
Sources cannot be deleted. Archive a source you no longer use.
Click the three dots at the end of the row, choose Archive and confirm. The source gets an Archived badge and is no longer used for tracking. To bring it back, choose Unarchive from the same menu.
Leads that already carry an archived source keep it. Archiving stops the source from being used for new tracking. It does not rewrite your history.
Good to know
Find a source. Use the search box to search by name, description and alias. The Status dropdown shows All, Active or Archived sources.
See all aliases. The list shows the first alias and a count of the others. Hover over the count to see them all.
Changes apply to new opt-ins. A new alias matches opt-ins that arrive from then on. Leads that came in earlier without a source stay without one. An Owner or Sales Manager can set the source on such a lead by hand, in Source Information on the lead page.
Keep the list short. One source per channel with several aliases works better than many near-identical sources. Filters on the dashboard and in saved views show every source in this list.
One alias, one source. Use each alias for a single source, so it is clear where a lead belongs.