Work with leads and saved views
Find the right leads, update them without leaving the list, plan your next touch point and save your filters as a view for yourself or your team.
The Leads screen is your working list of everyone in your pipeline. You can use it as a table or as a board, change most things directly in the list, and save a set of filters as a view so you open the same list every day.
Analysts can open Leads and saved views but cannot change anything. The buttons described below are hidden for them.
Find and update leads
Open Leads and pick your layout
Click Leads in the left sidebar. At the right of the toolbar, two icons switch between the table (list icon) and the board (grid icon). On the board, every column is a status. Hermon remembers your choice.
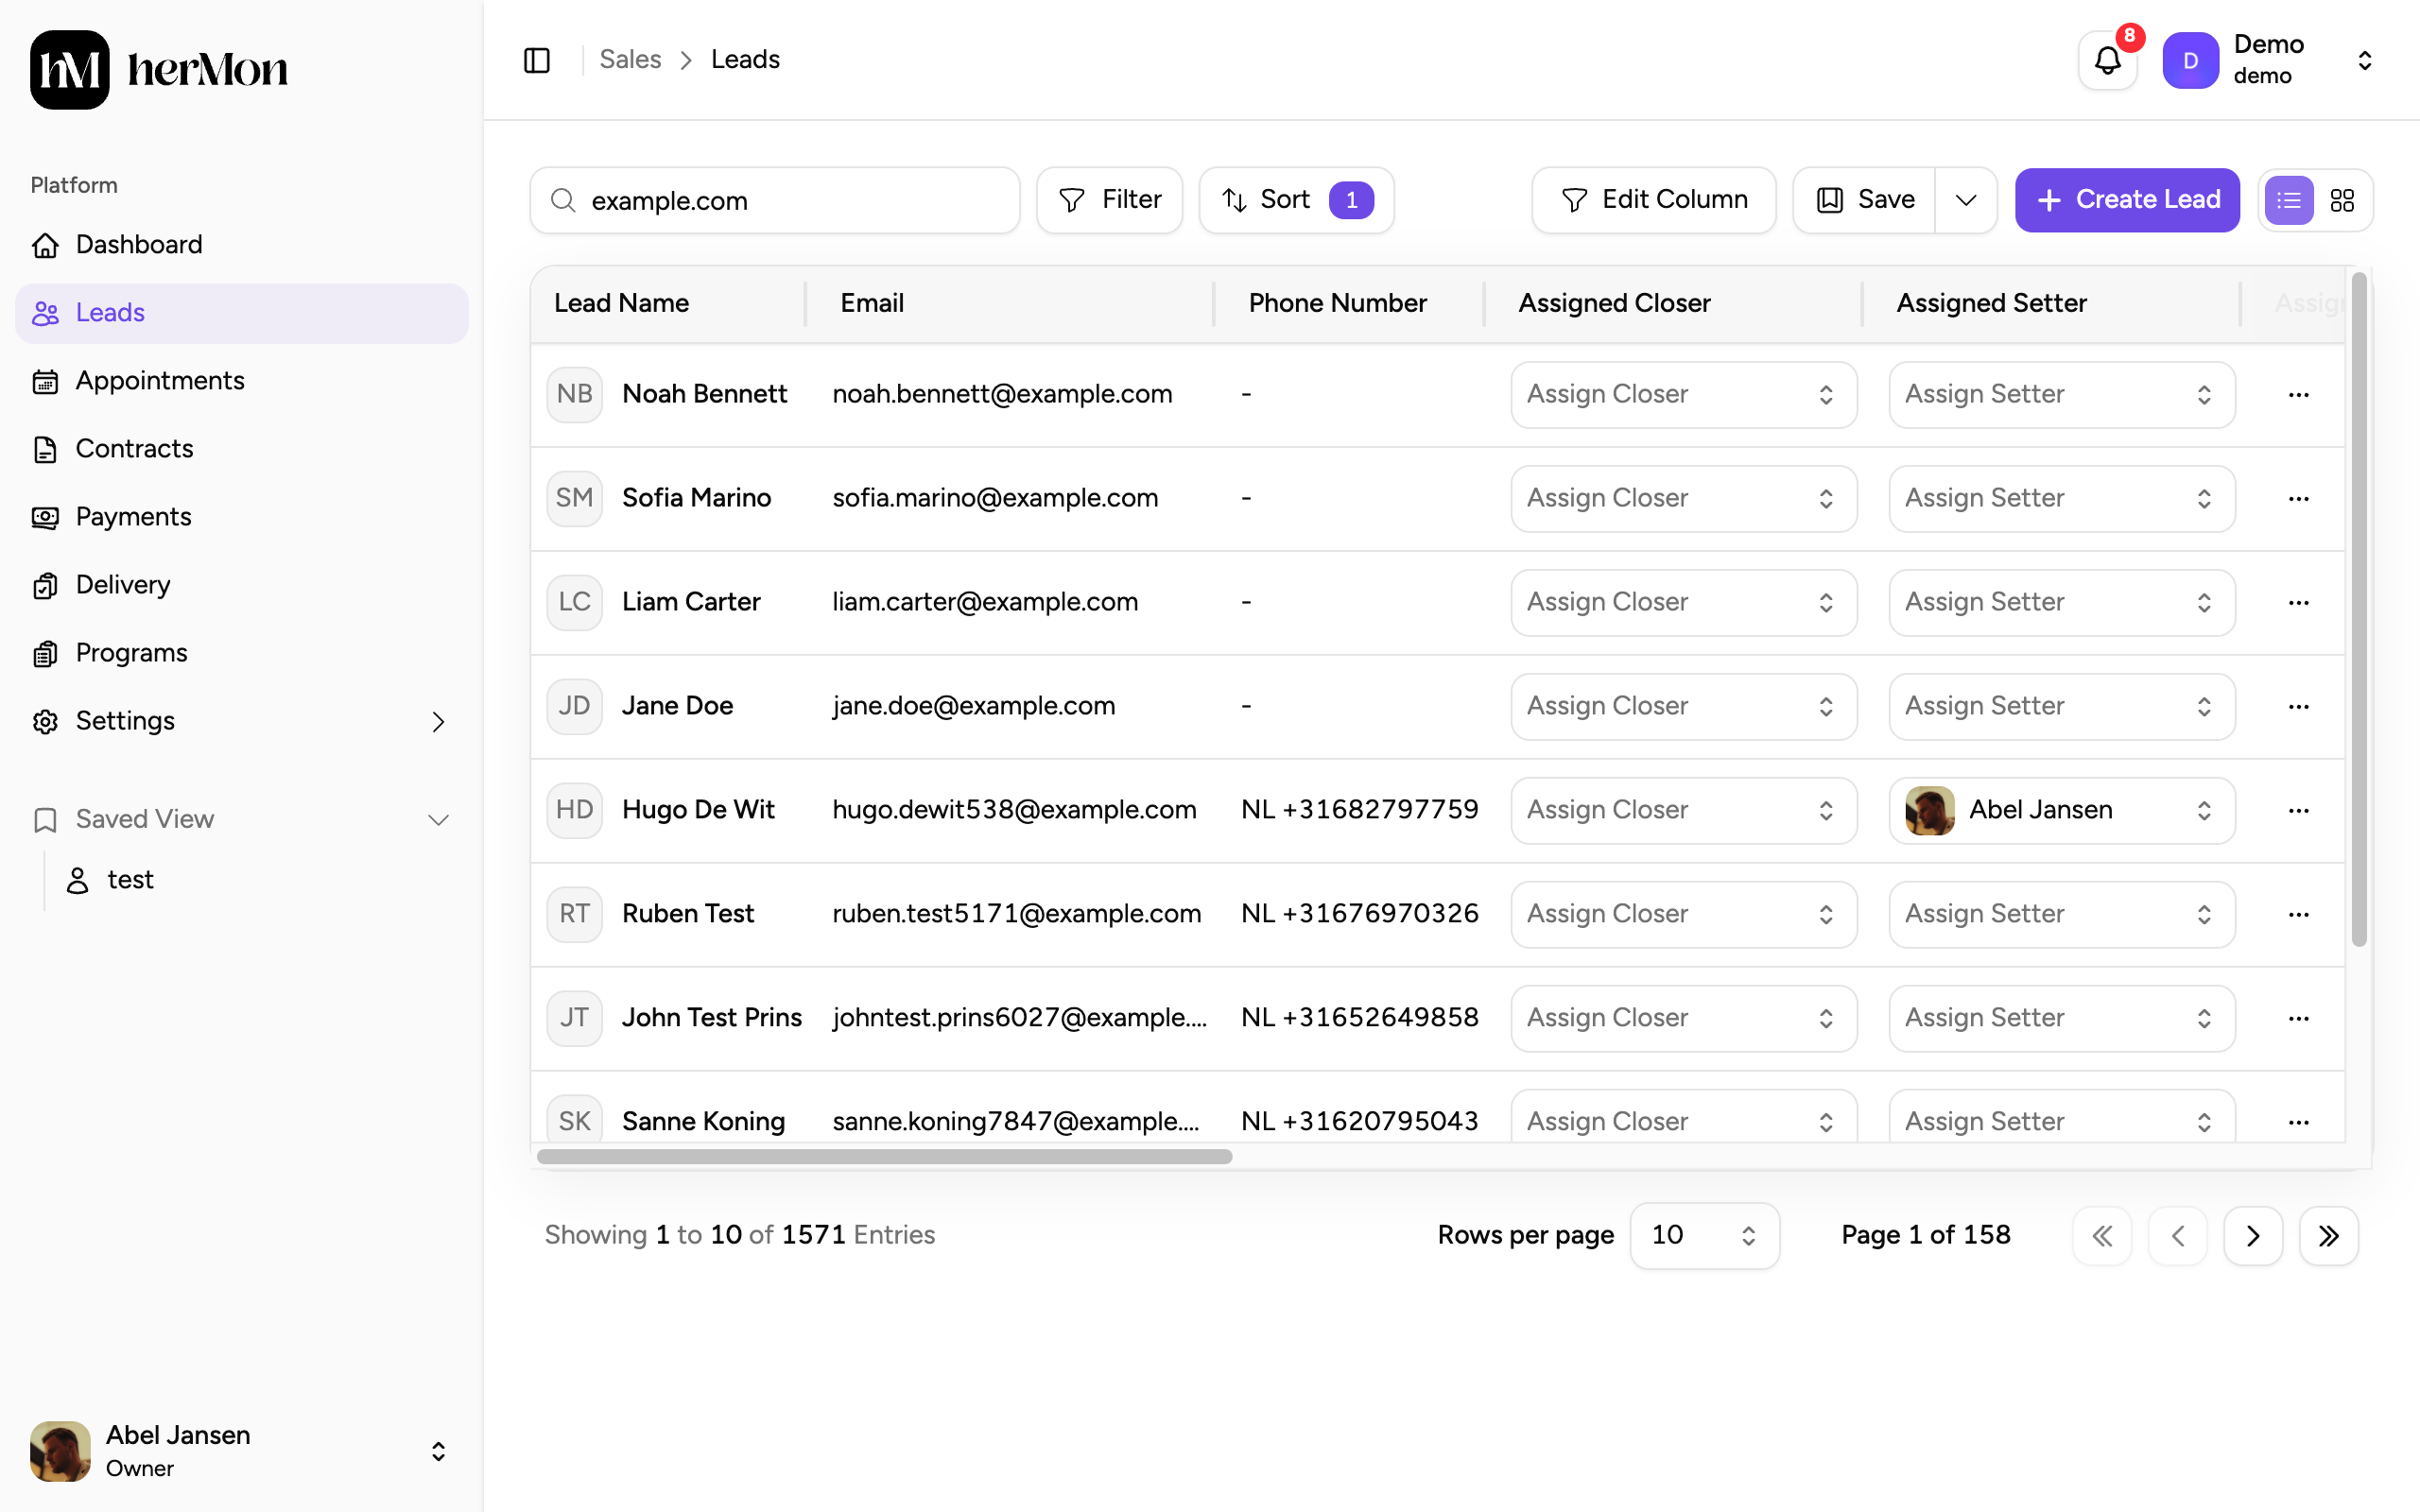
1. Search box. 2. Switch between table and board. Search, filter and sort
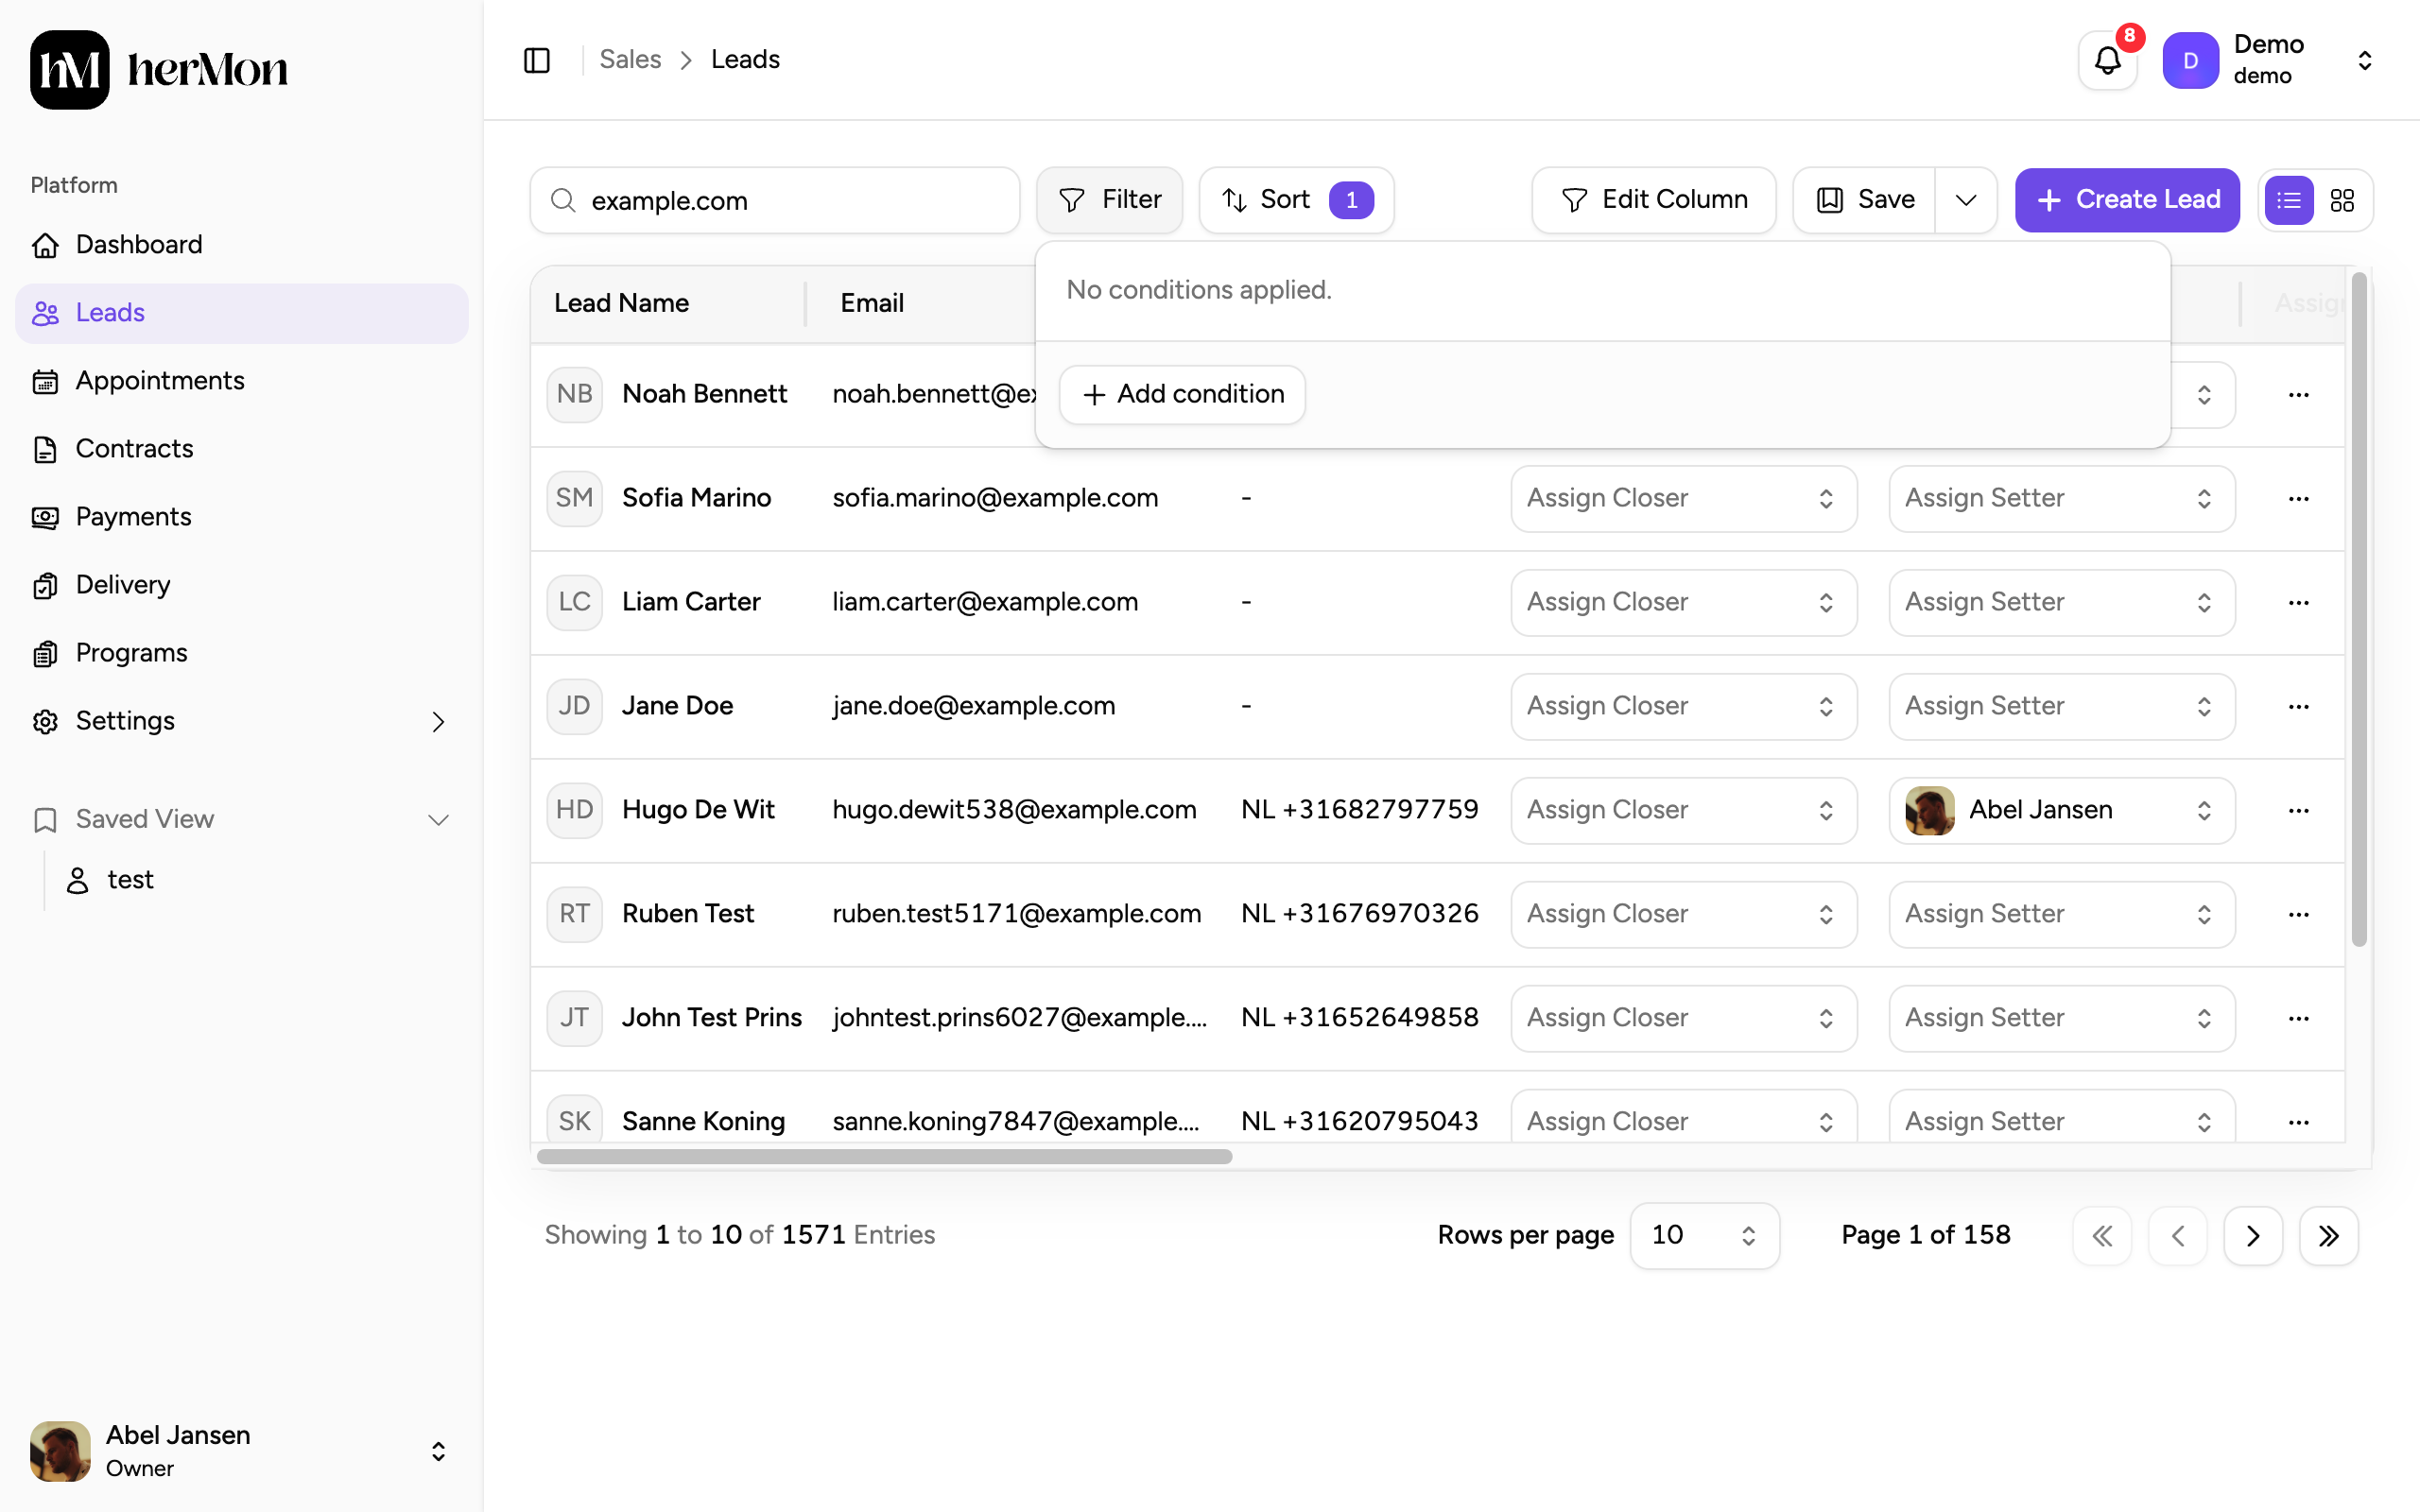
Type a name, email or phone number in the search box. Click Filter, then Add condition, to narrow the list, for example to one status or one closer. Use Sort to change the order. New leads are shown first by default.
In the table, Edit Column lets you hide columns you do not need.
Update a lead straight from the list
You do not have to open a lead to keep it up to date:
- Status: click the status badge and pick a new one. On the board, drag the card to another column.
- Assigned Closer, Setter and Triager: click the cell and pick a team member, or None.
- Next Touchpoint: click Add Touchpoint, choose a date, and optionally a time and follow-up type.
- Notes: click Add Note to write a note without leaving the list.
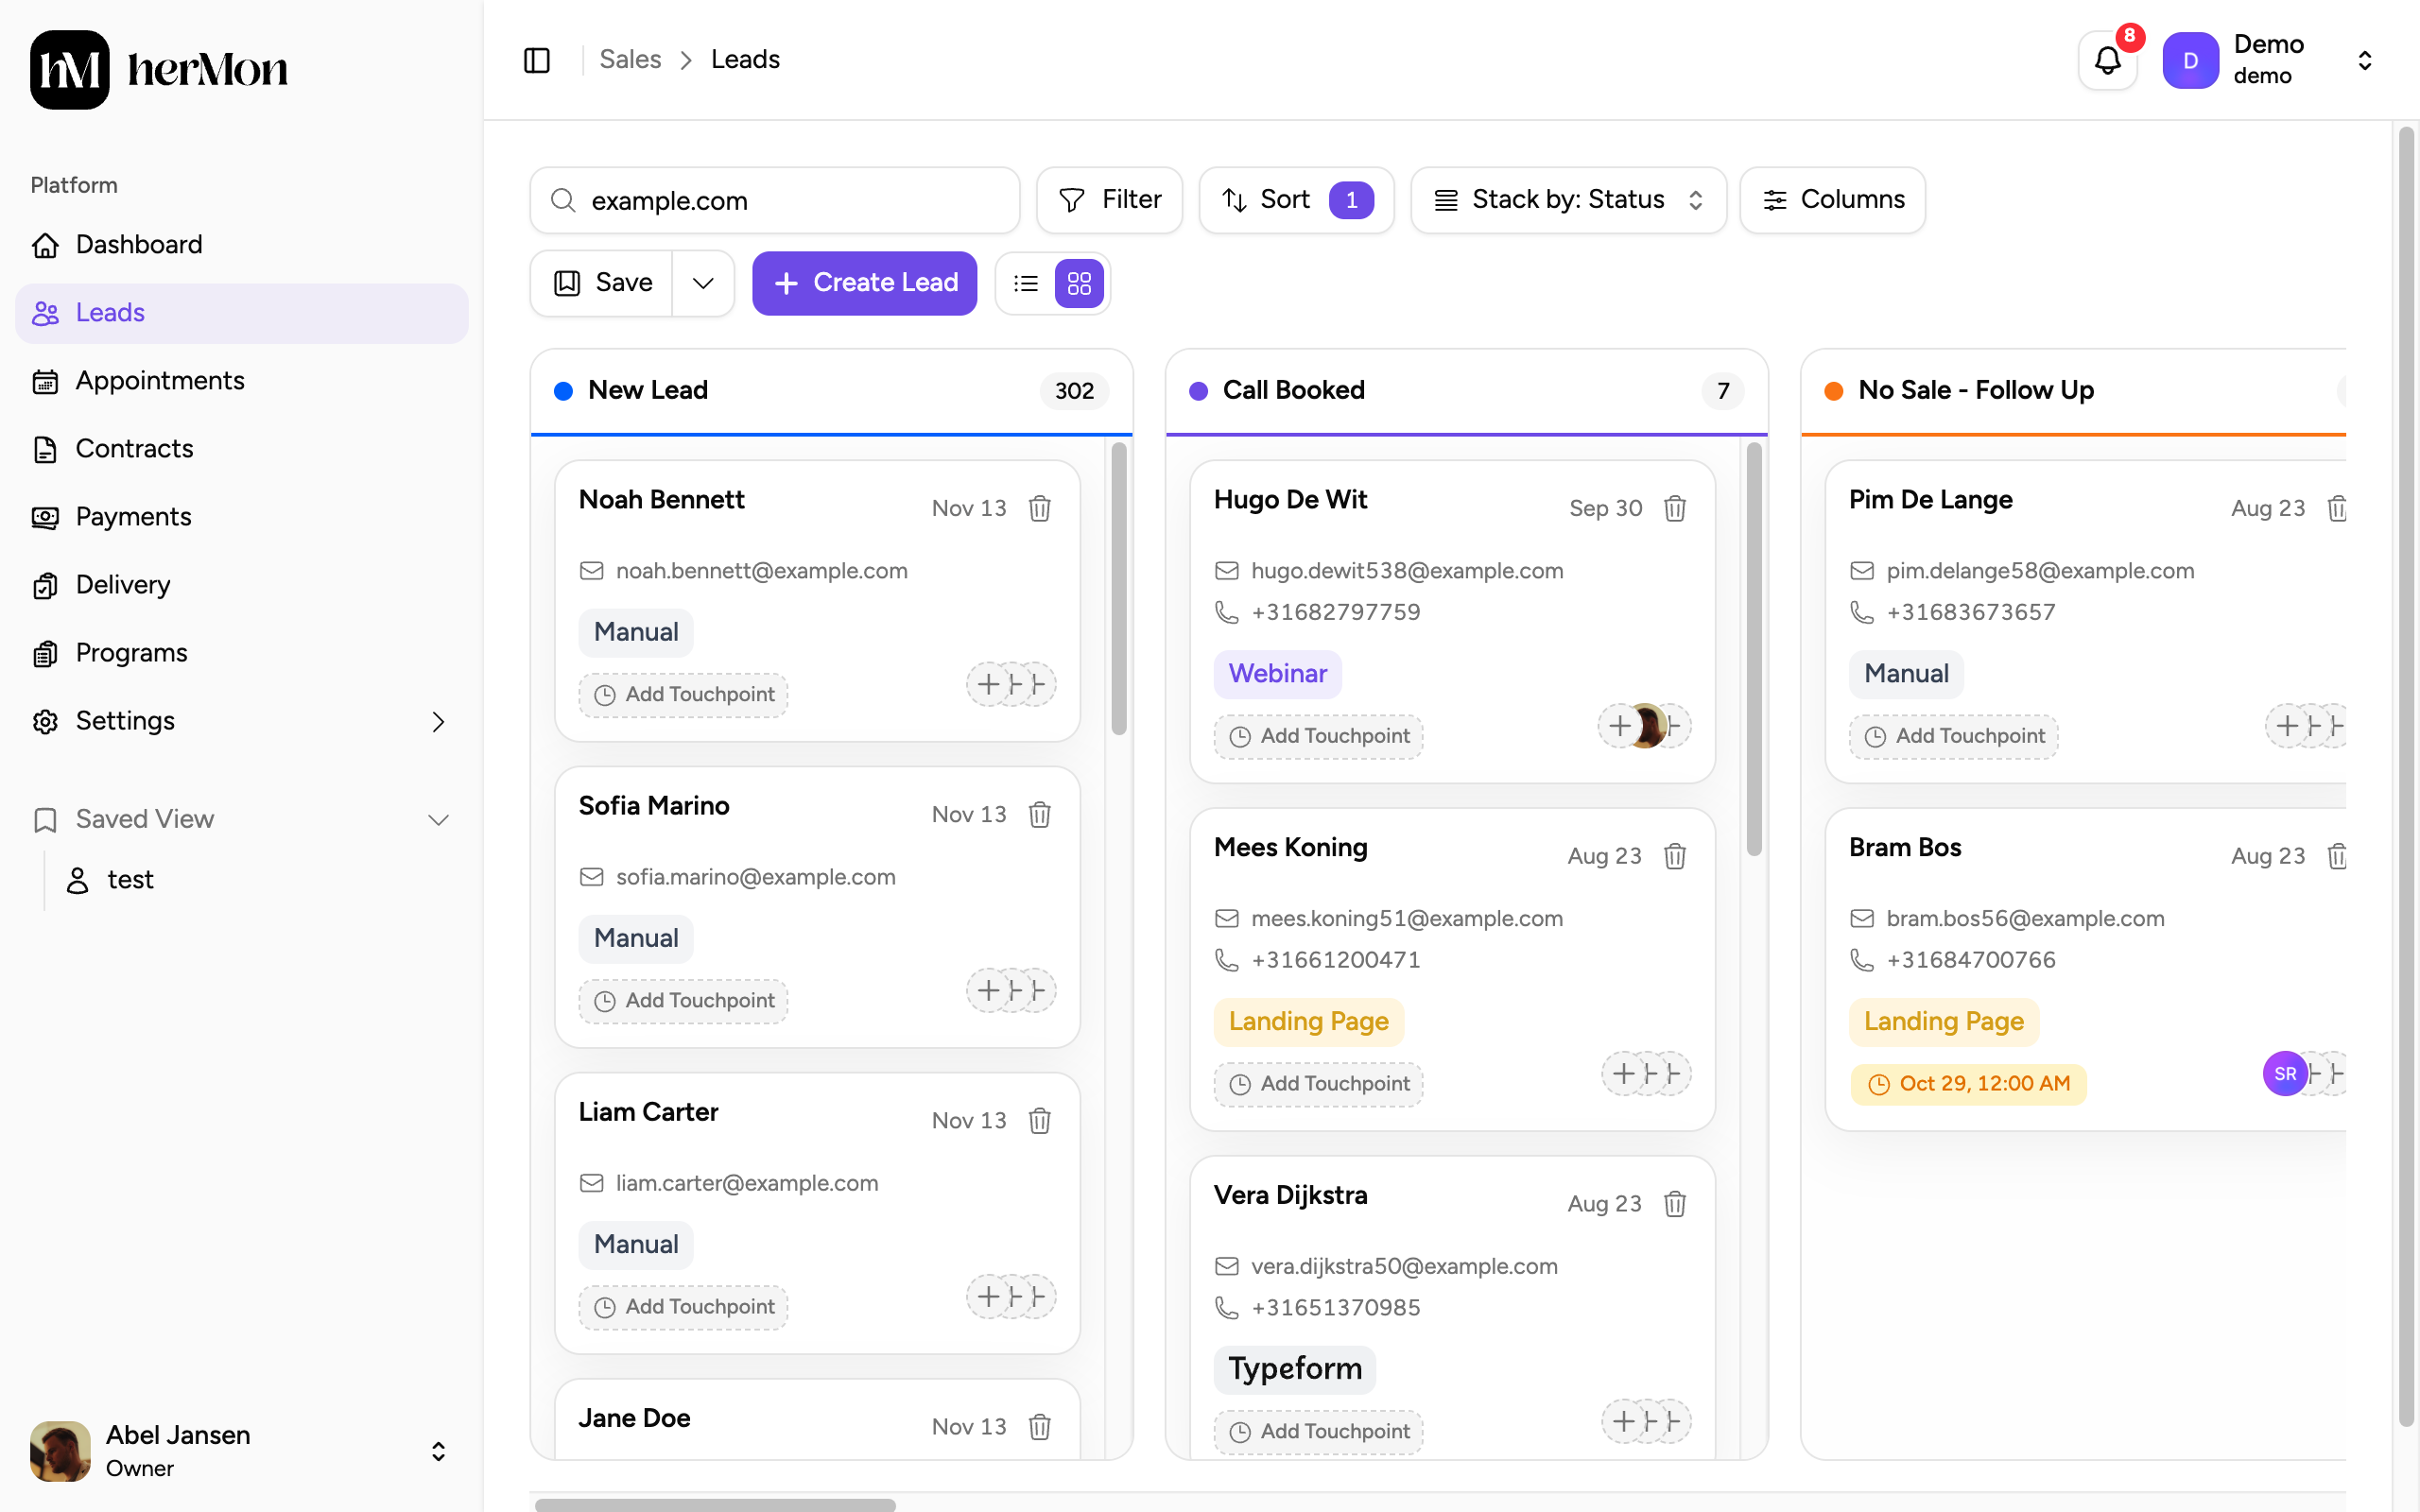
On the board, drag a card to another column to change its status. Open a lead for the full picture
Click a row, or a card on the board, to open the lead. On the left you see status, assignments, touch points and source information. On the right, tabs hold everything linked to this lead: Notes, Opt-ins, Appointment, Contracts, Payments and Engagements.
The buttons under the name let you Edit the lead, book an Appointment, start a Contract, or use Merge Lead when the same person exists twice.
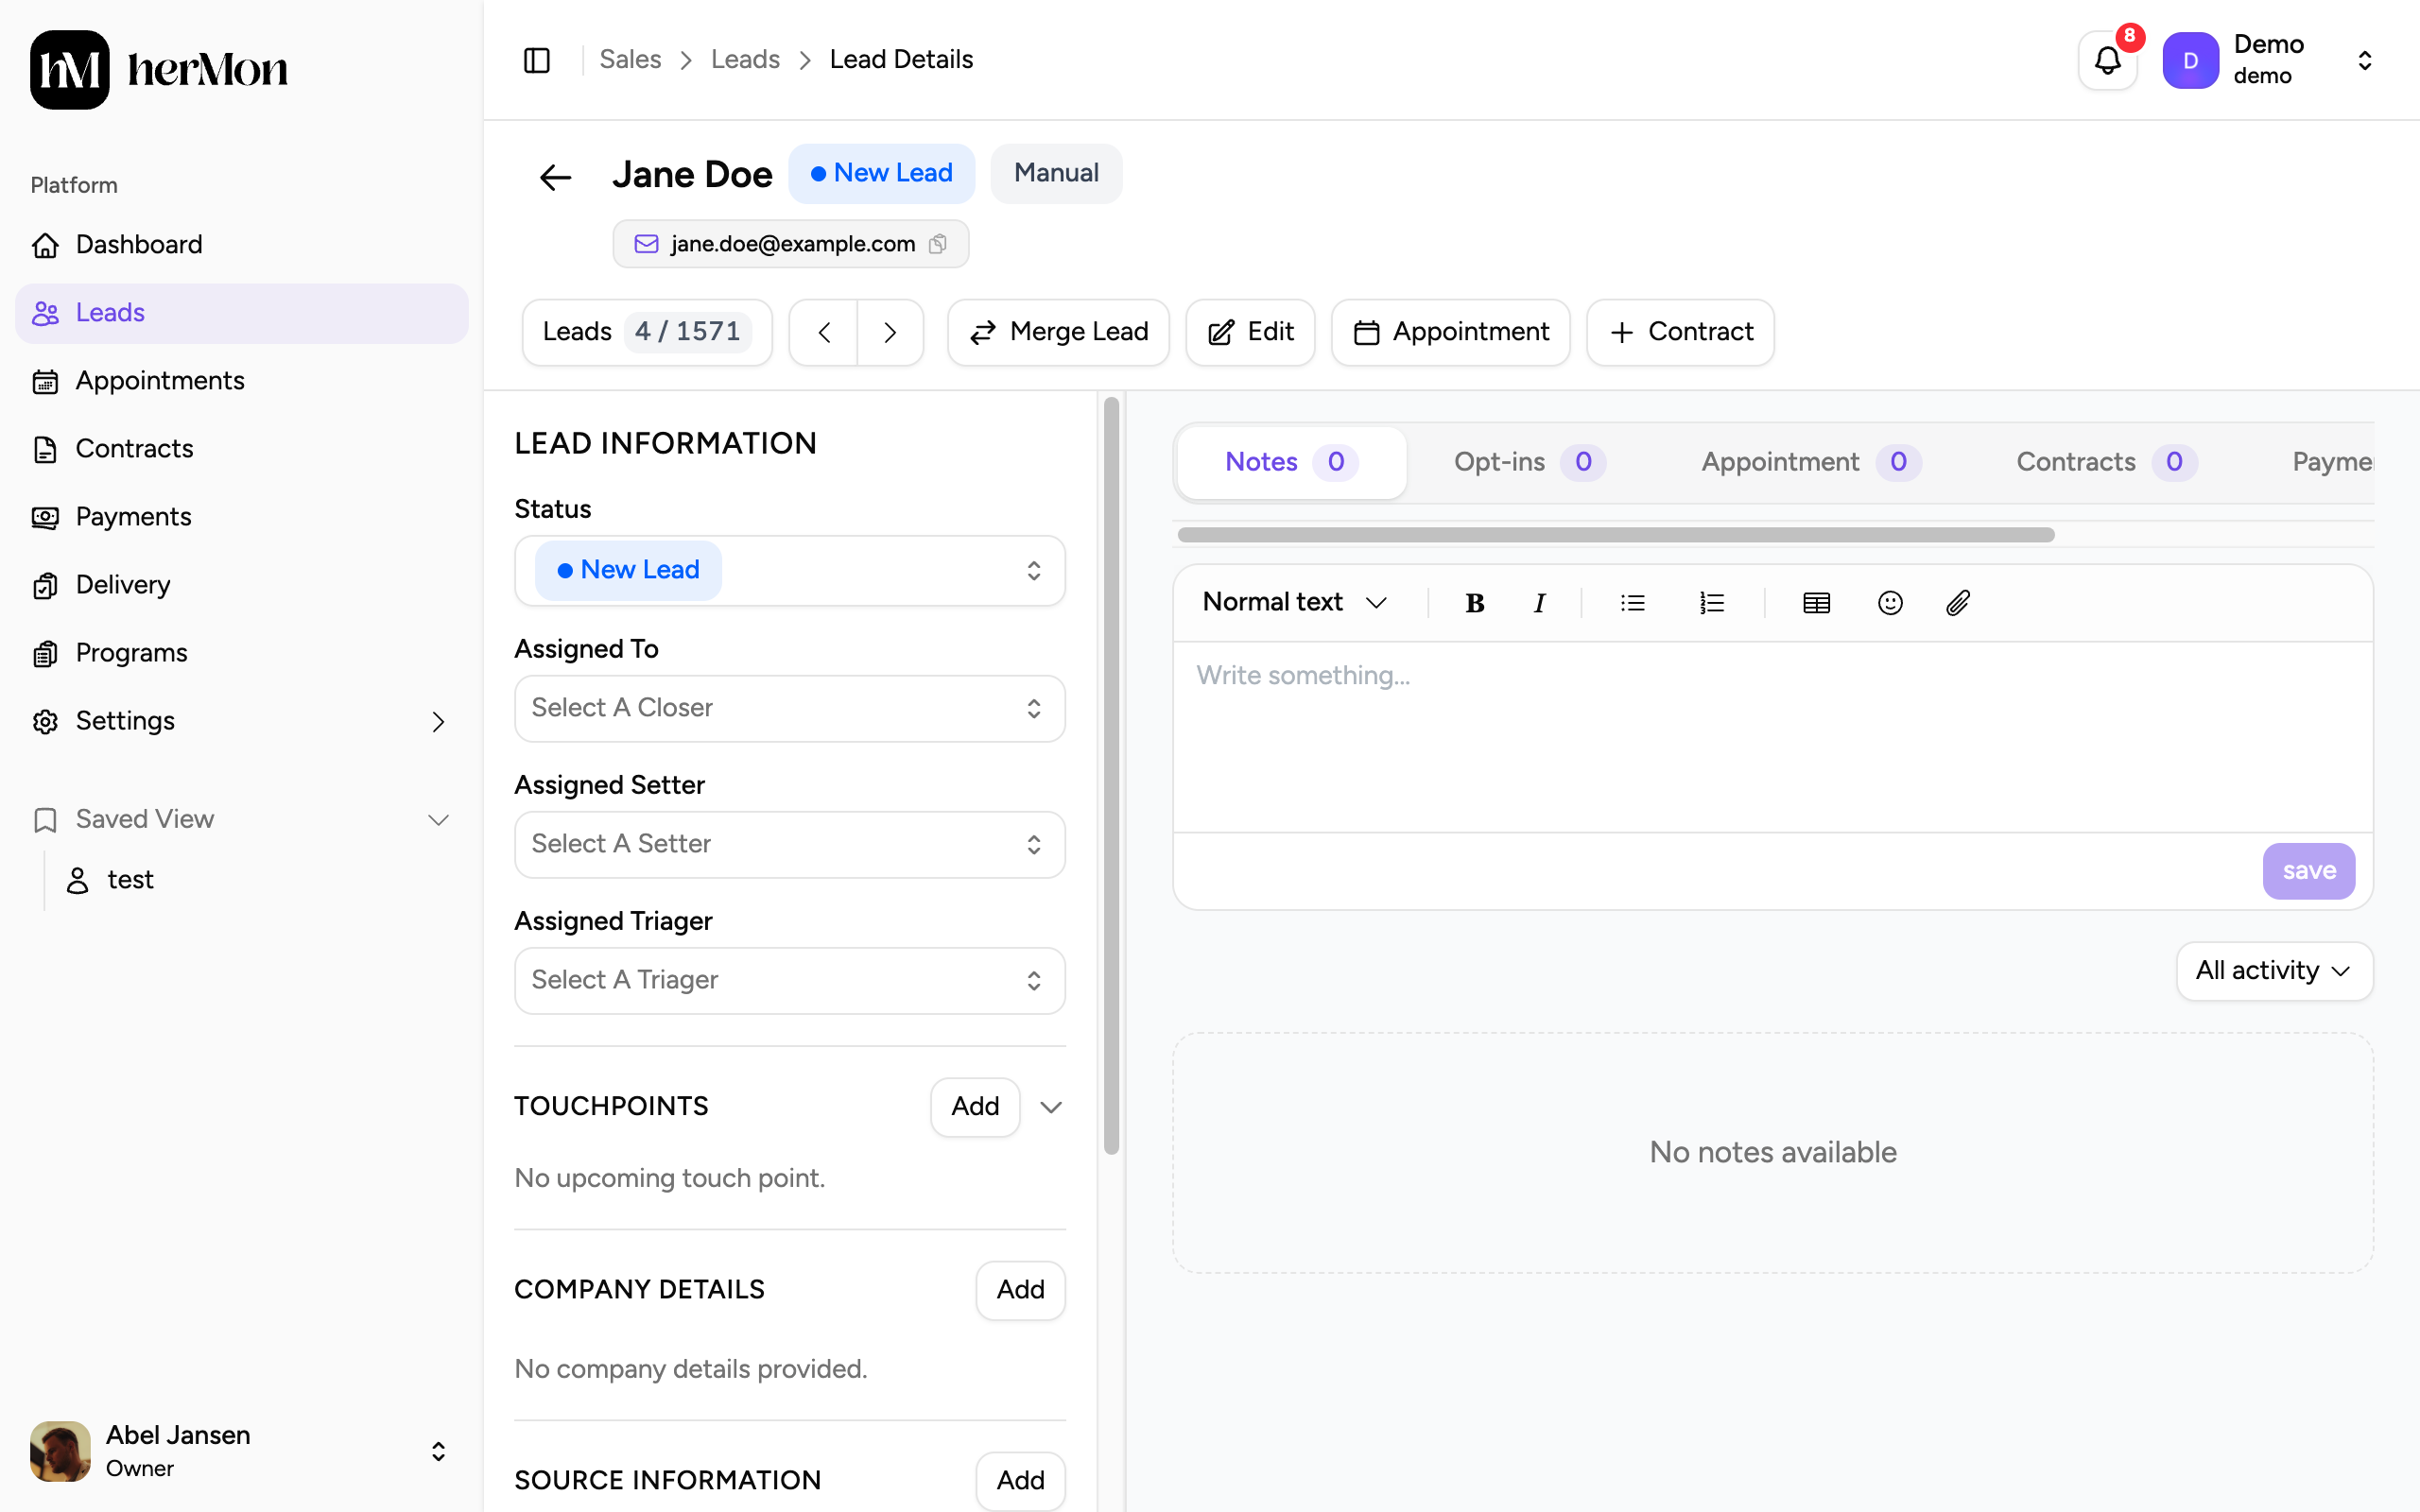
1. Actions for this lead. 2. Status, assignments and touch points. 3. Tabs with notes, opt-ins, appointments, contracts and payments. Add a lead by hand
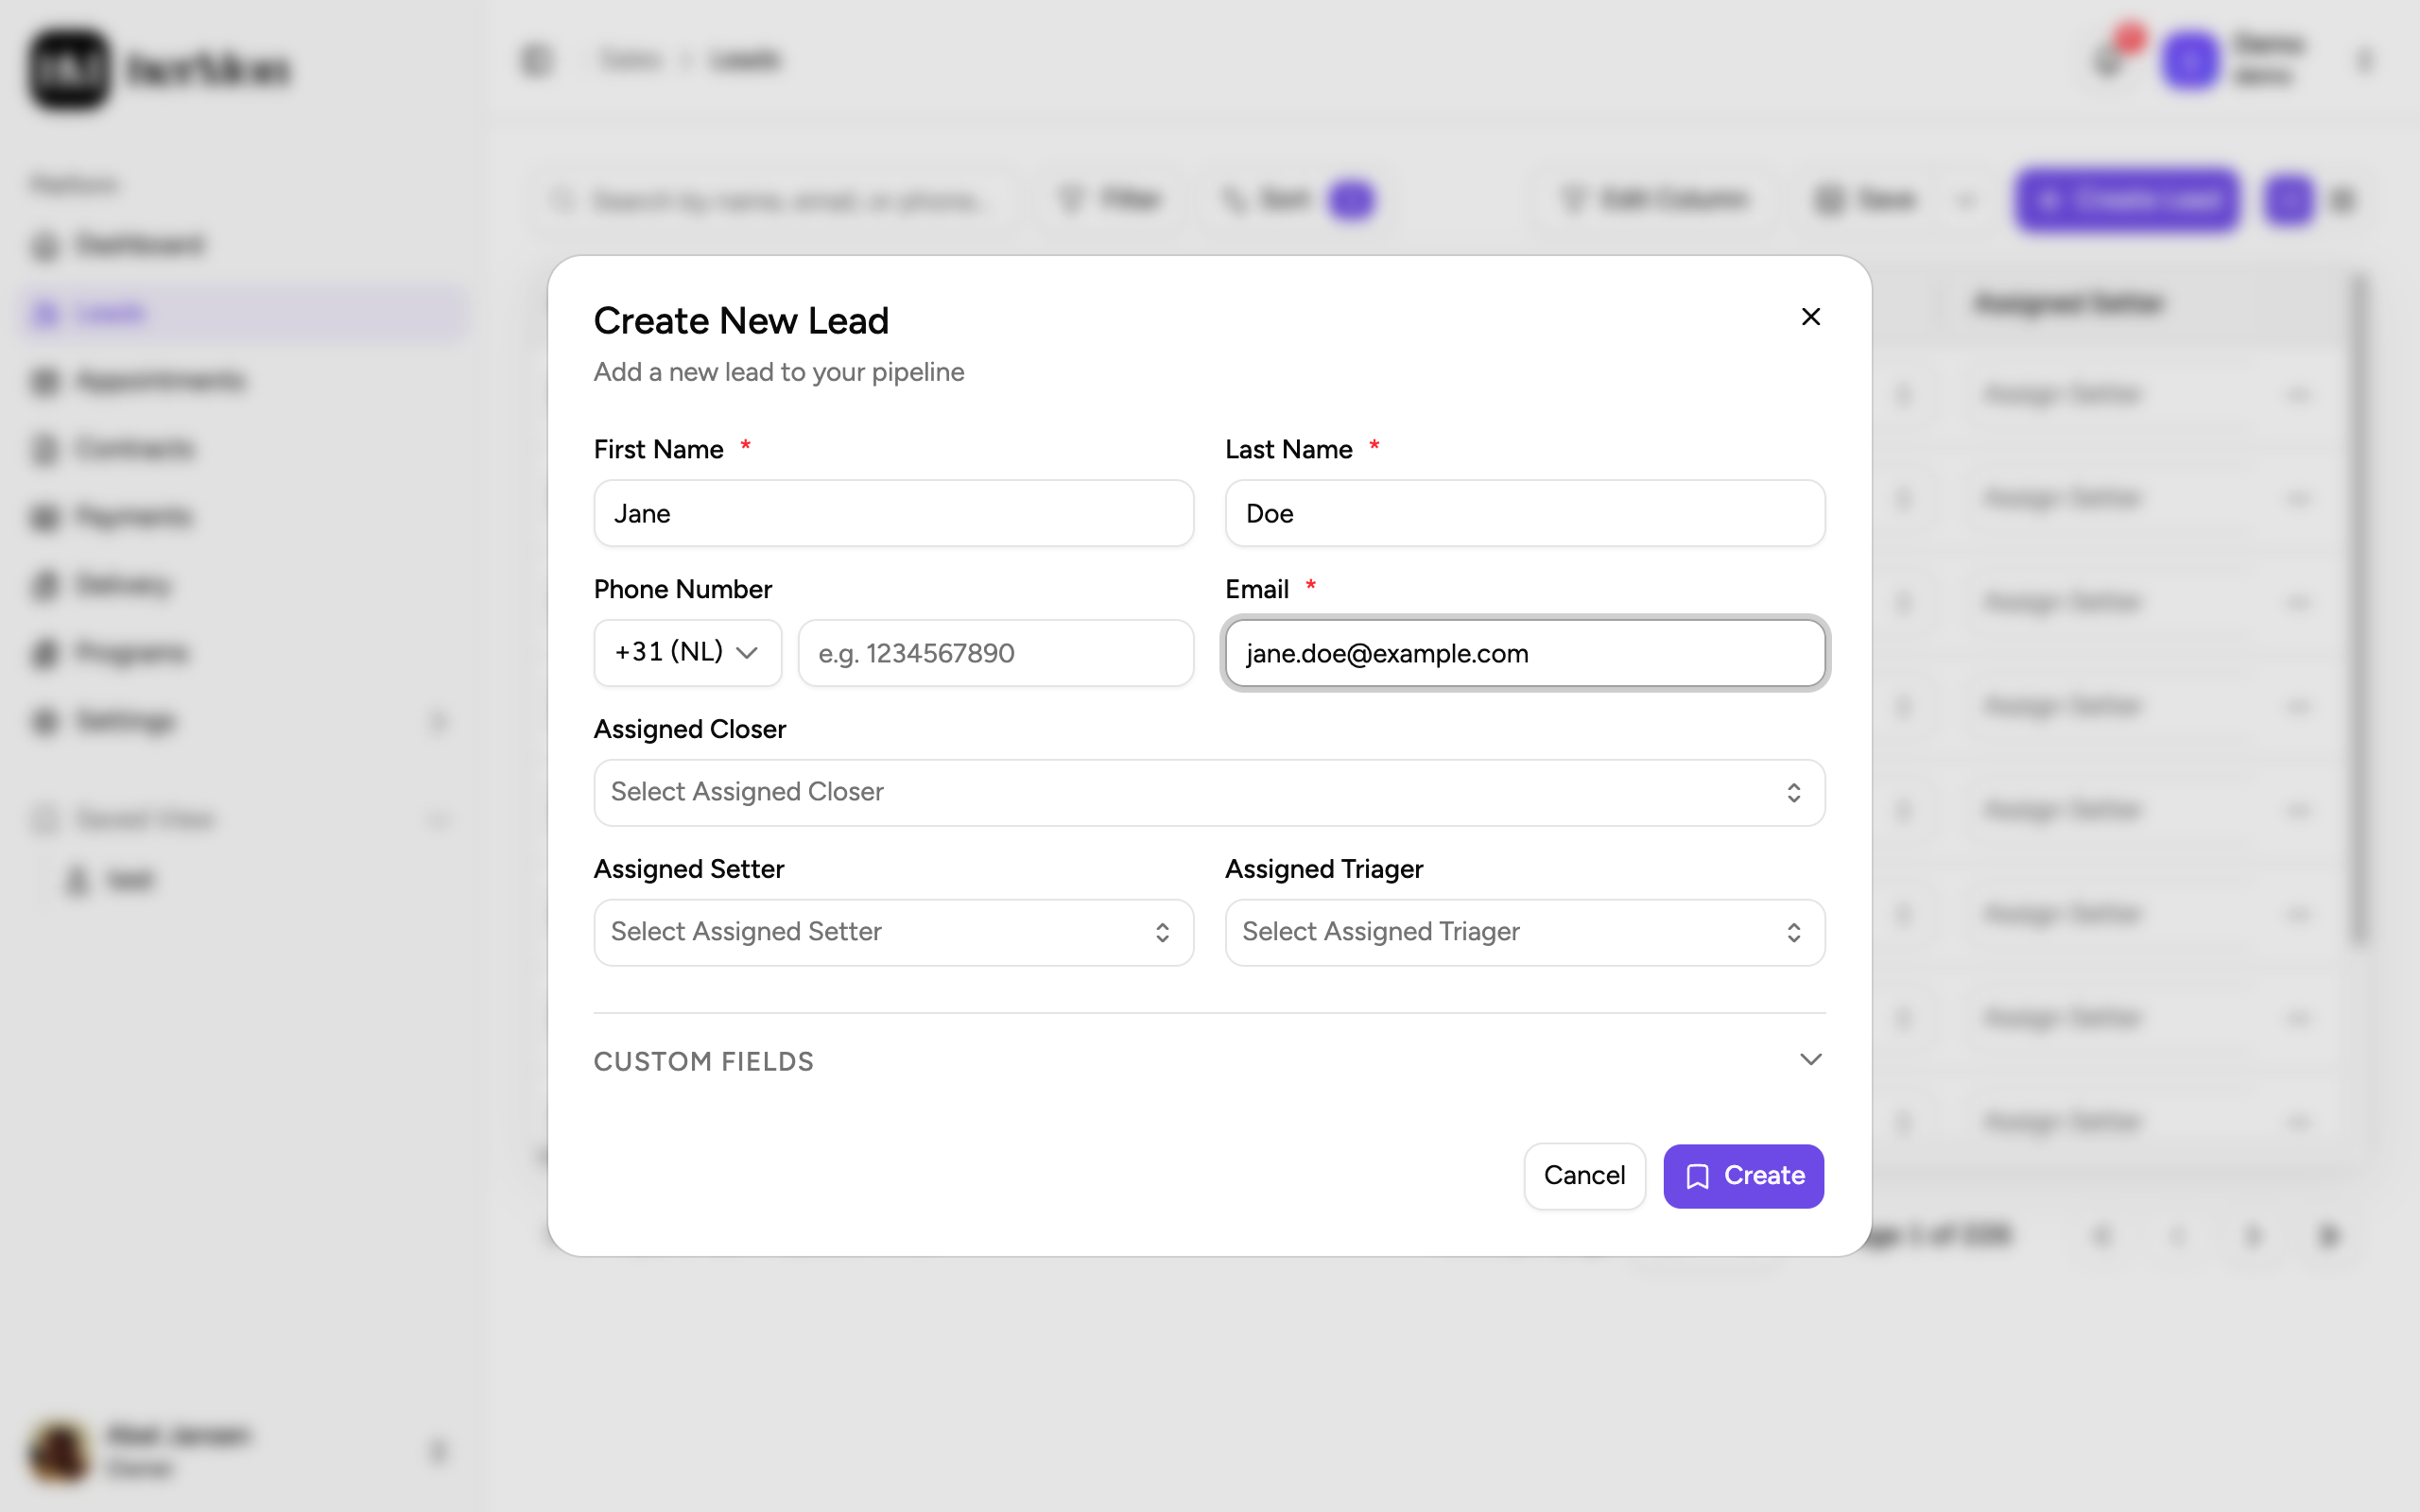
Most leads arrive through your funnels and connected tools. To add one yourself, click Create Lead, fill in First Name, Last Name and Email, and click Create. Phone number and assignments are optional.
Save your filters as a view
A saved view stores your filters, visible columns, sort order and layout under a name you choose, such as "Calls to follow up". Views exist on Leads, Appointment, Contracts, Payments, Delivery and the Dashboard.
Watch the flow
Save a filtered list as a view
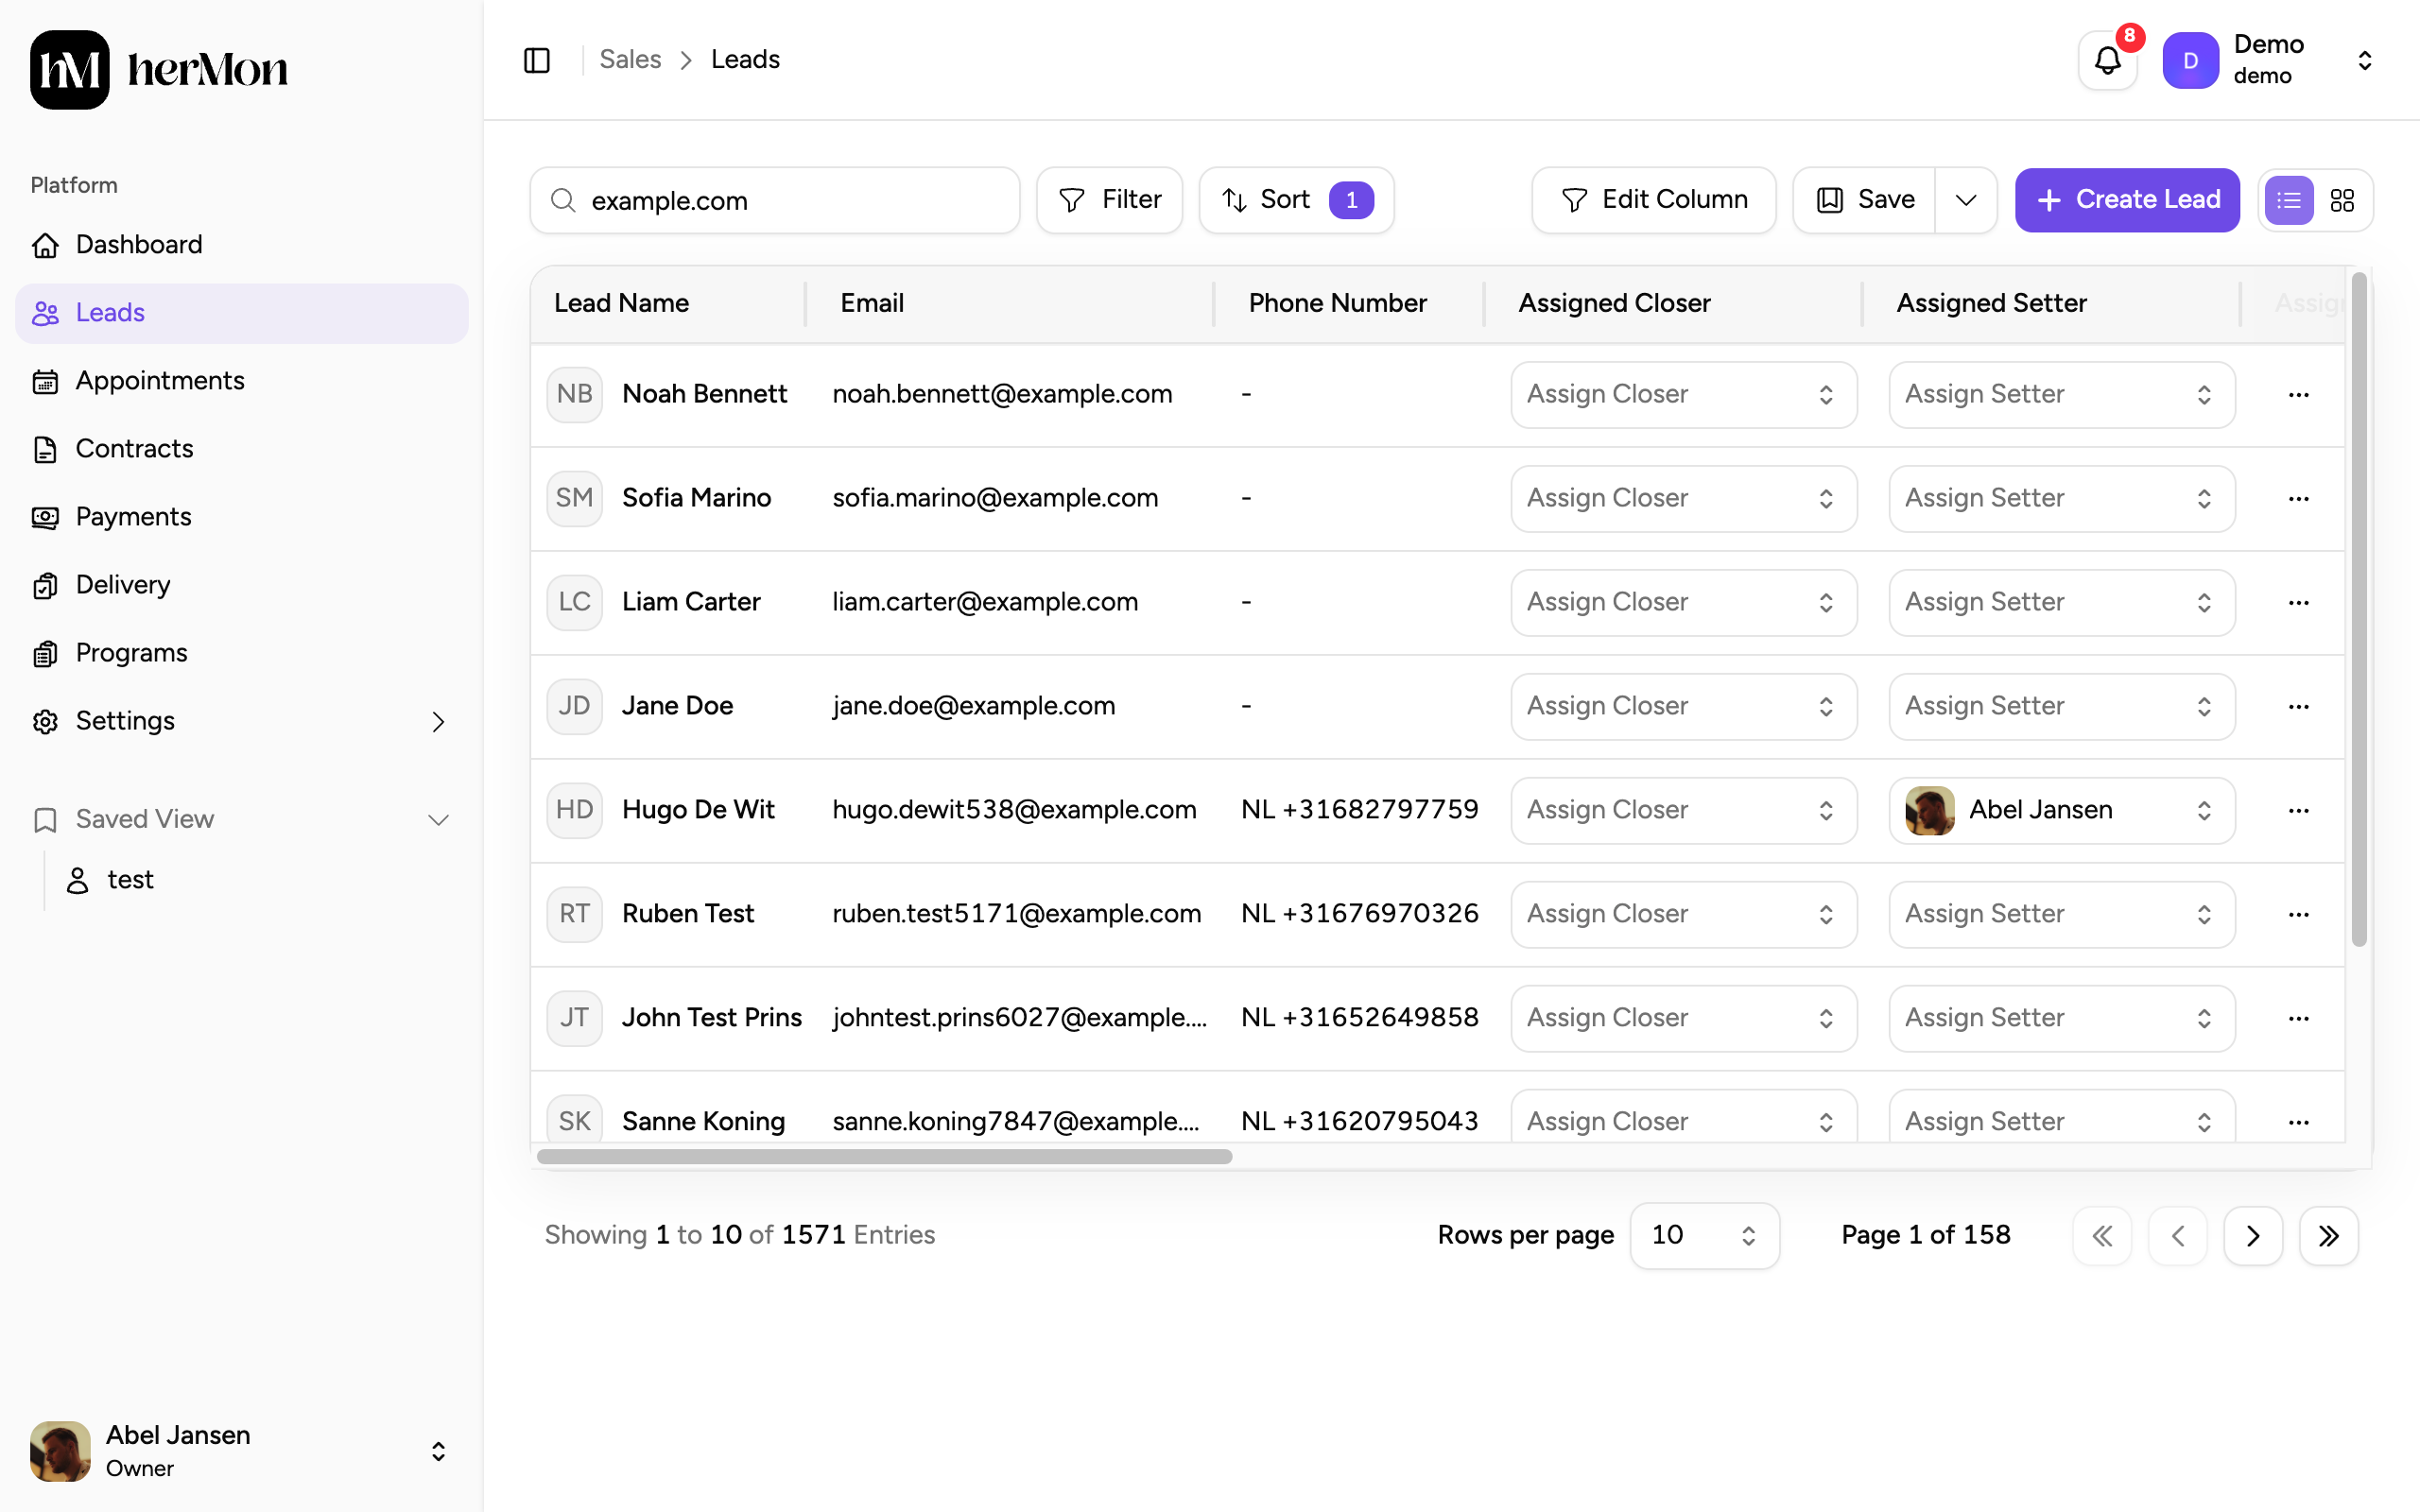
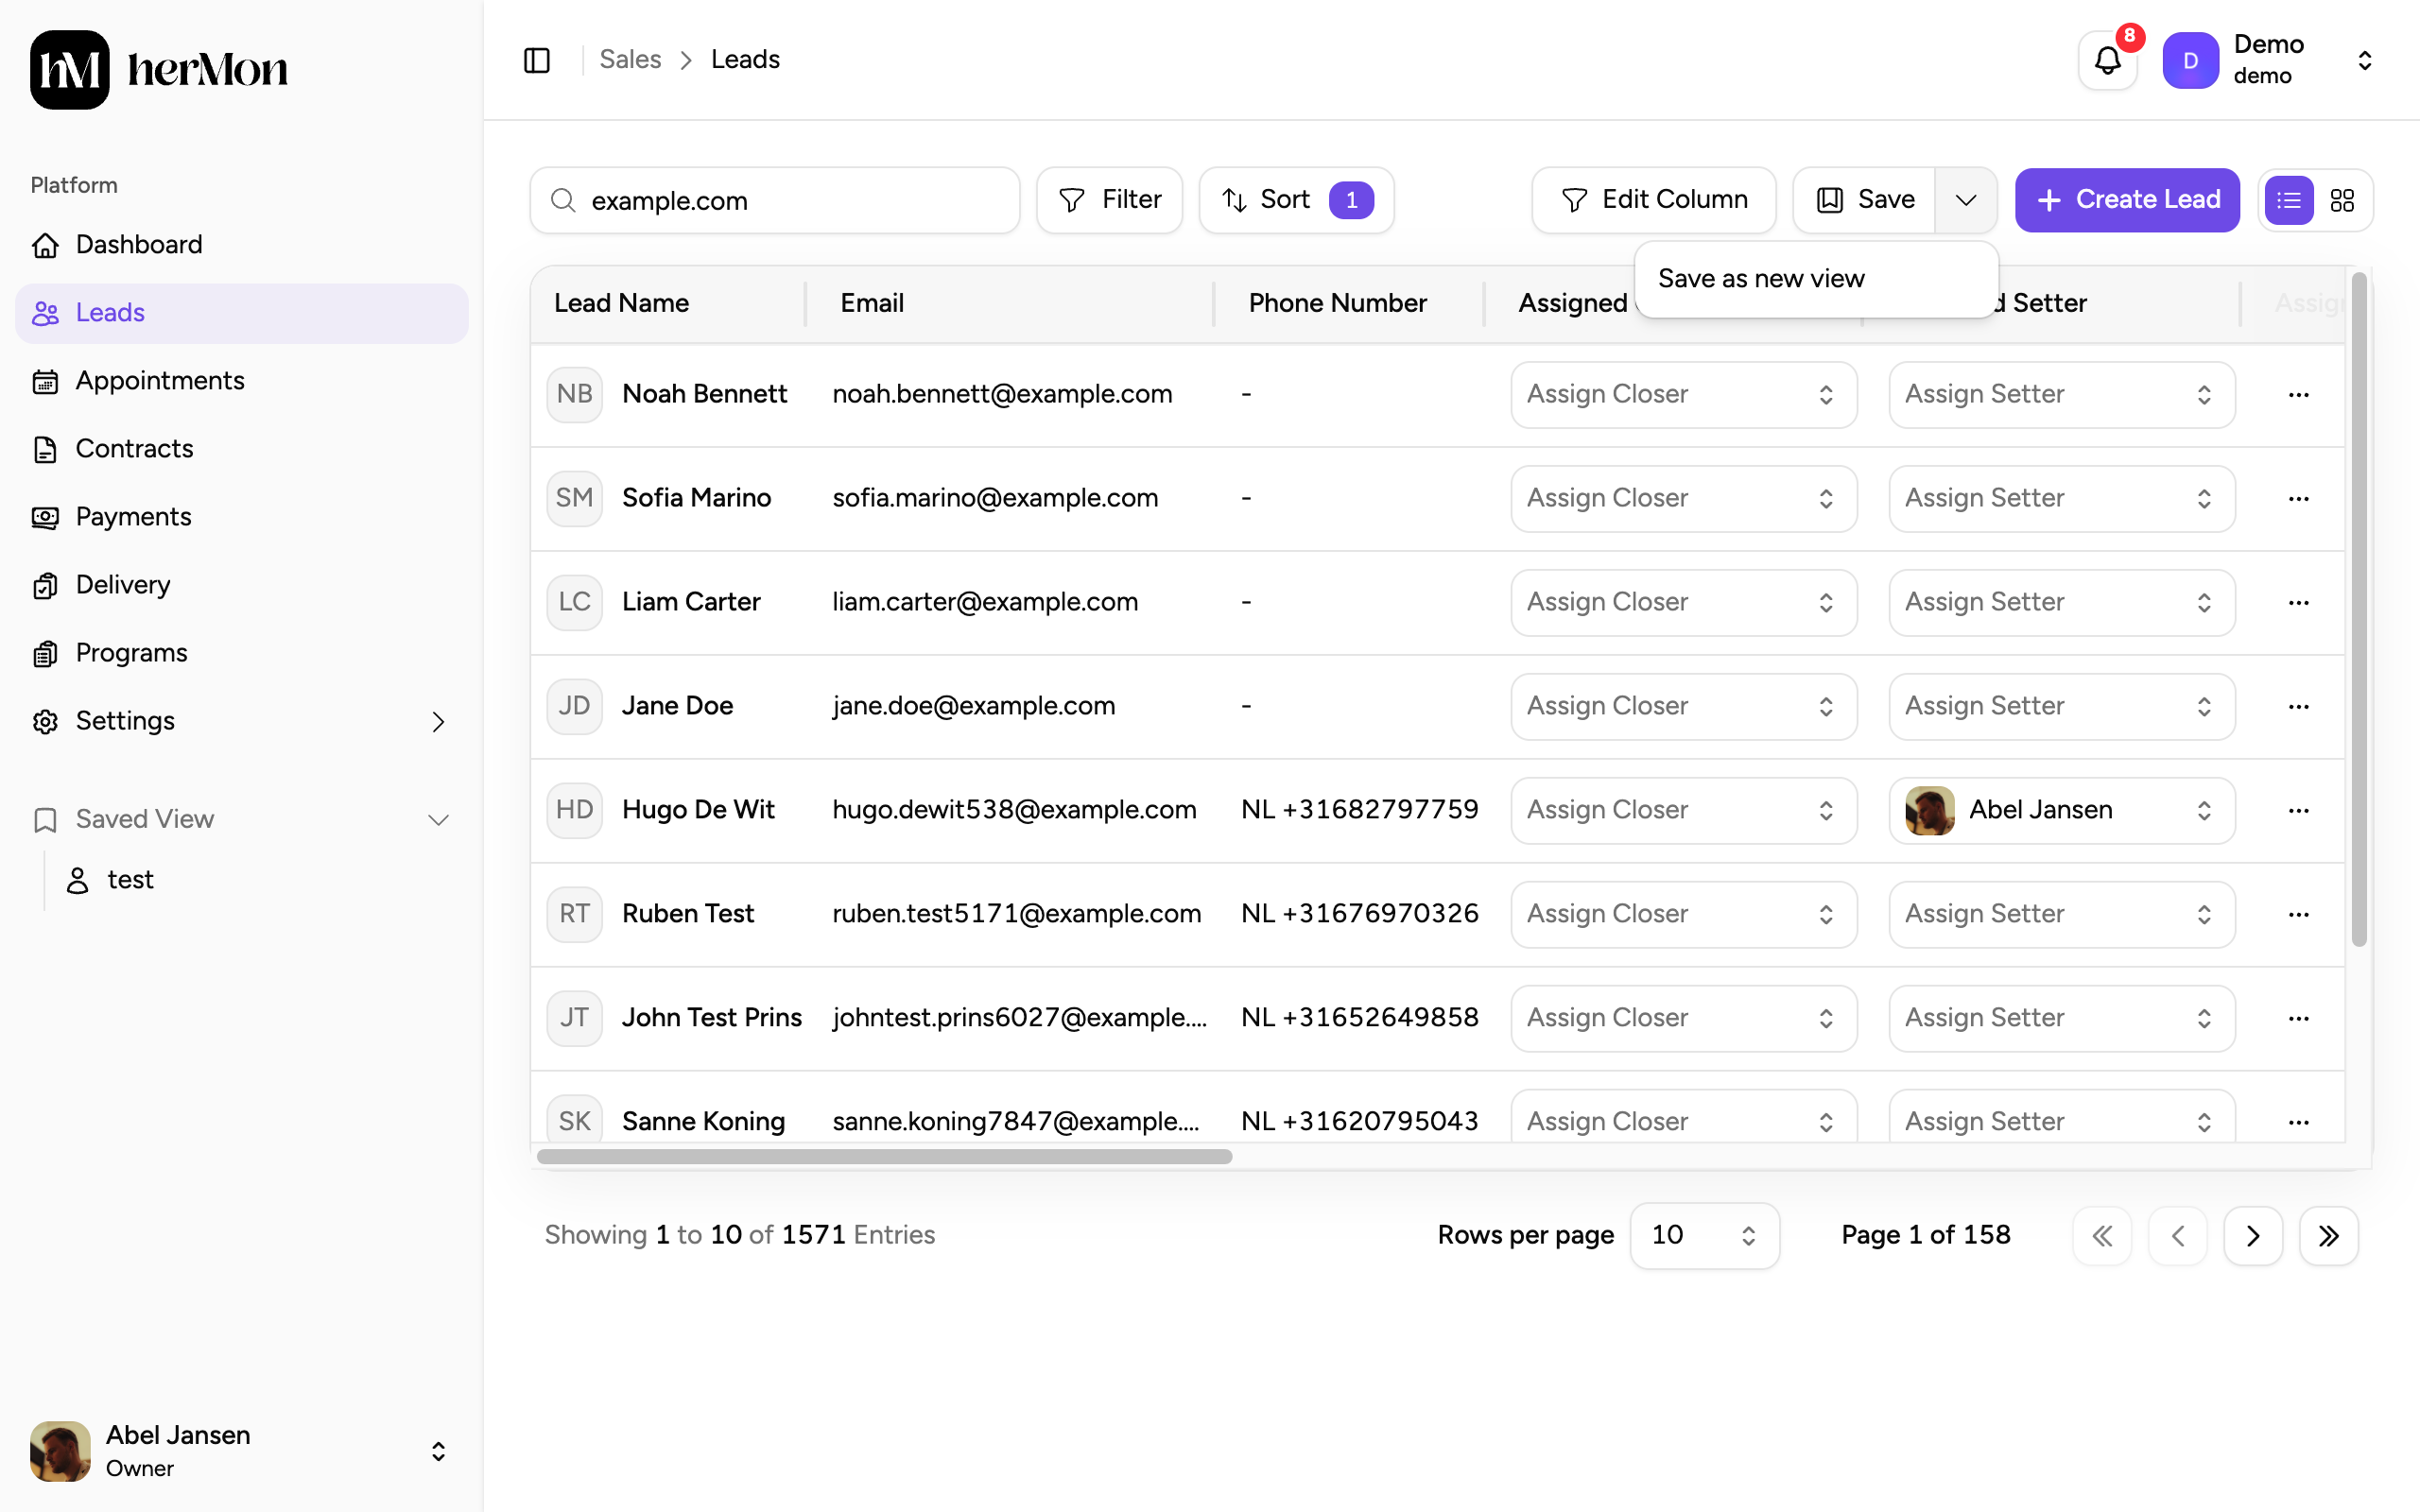
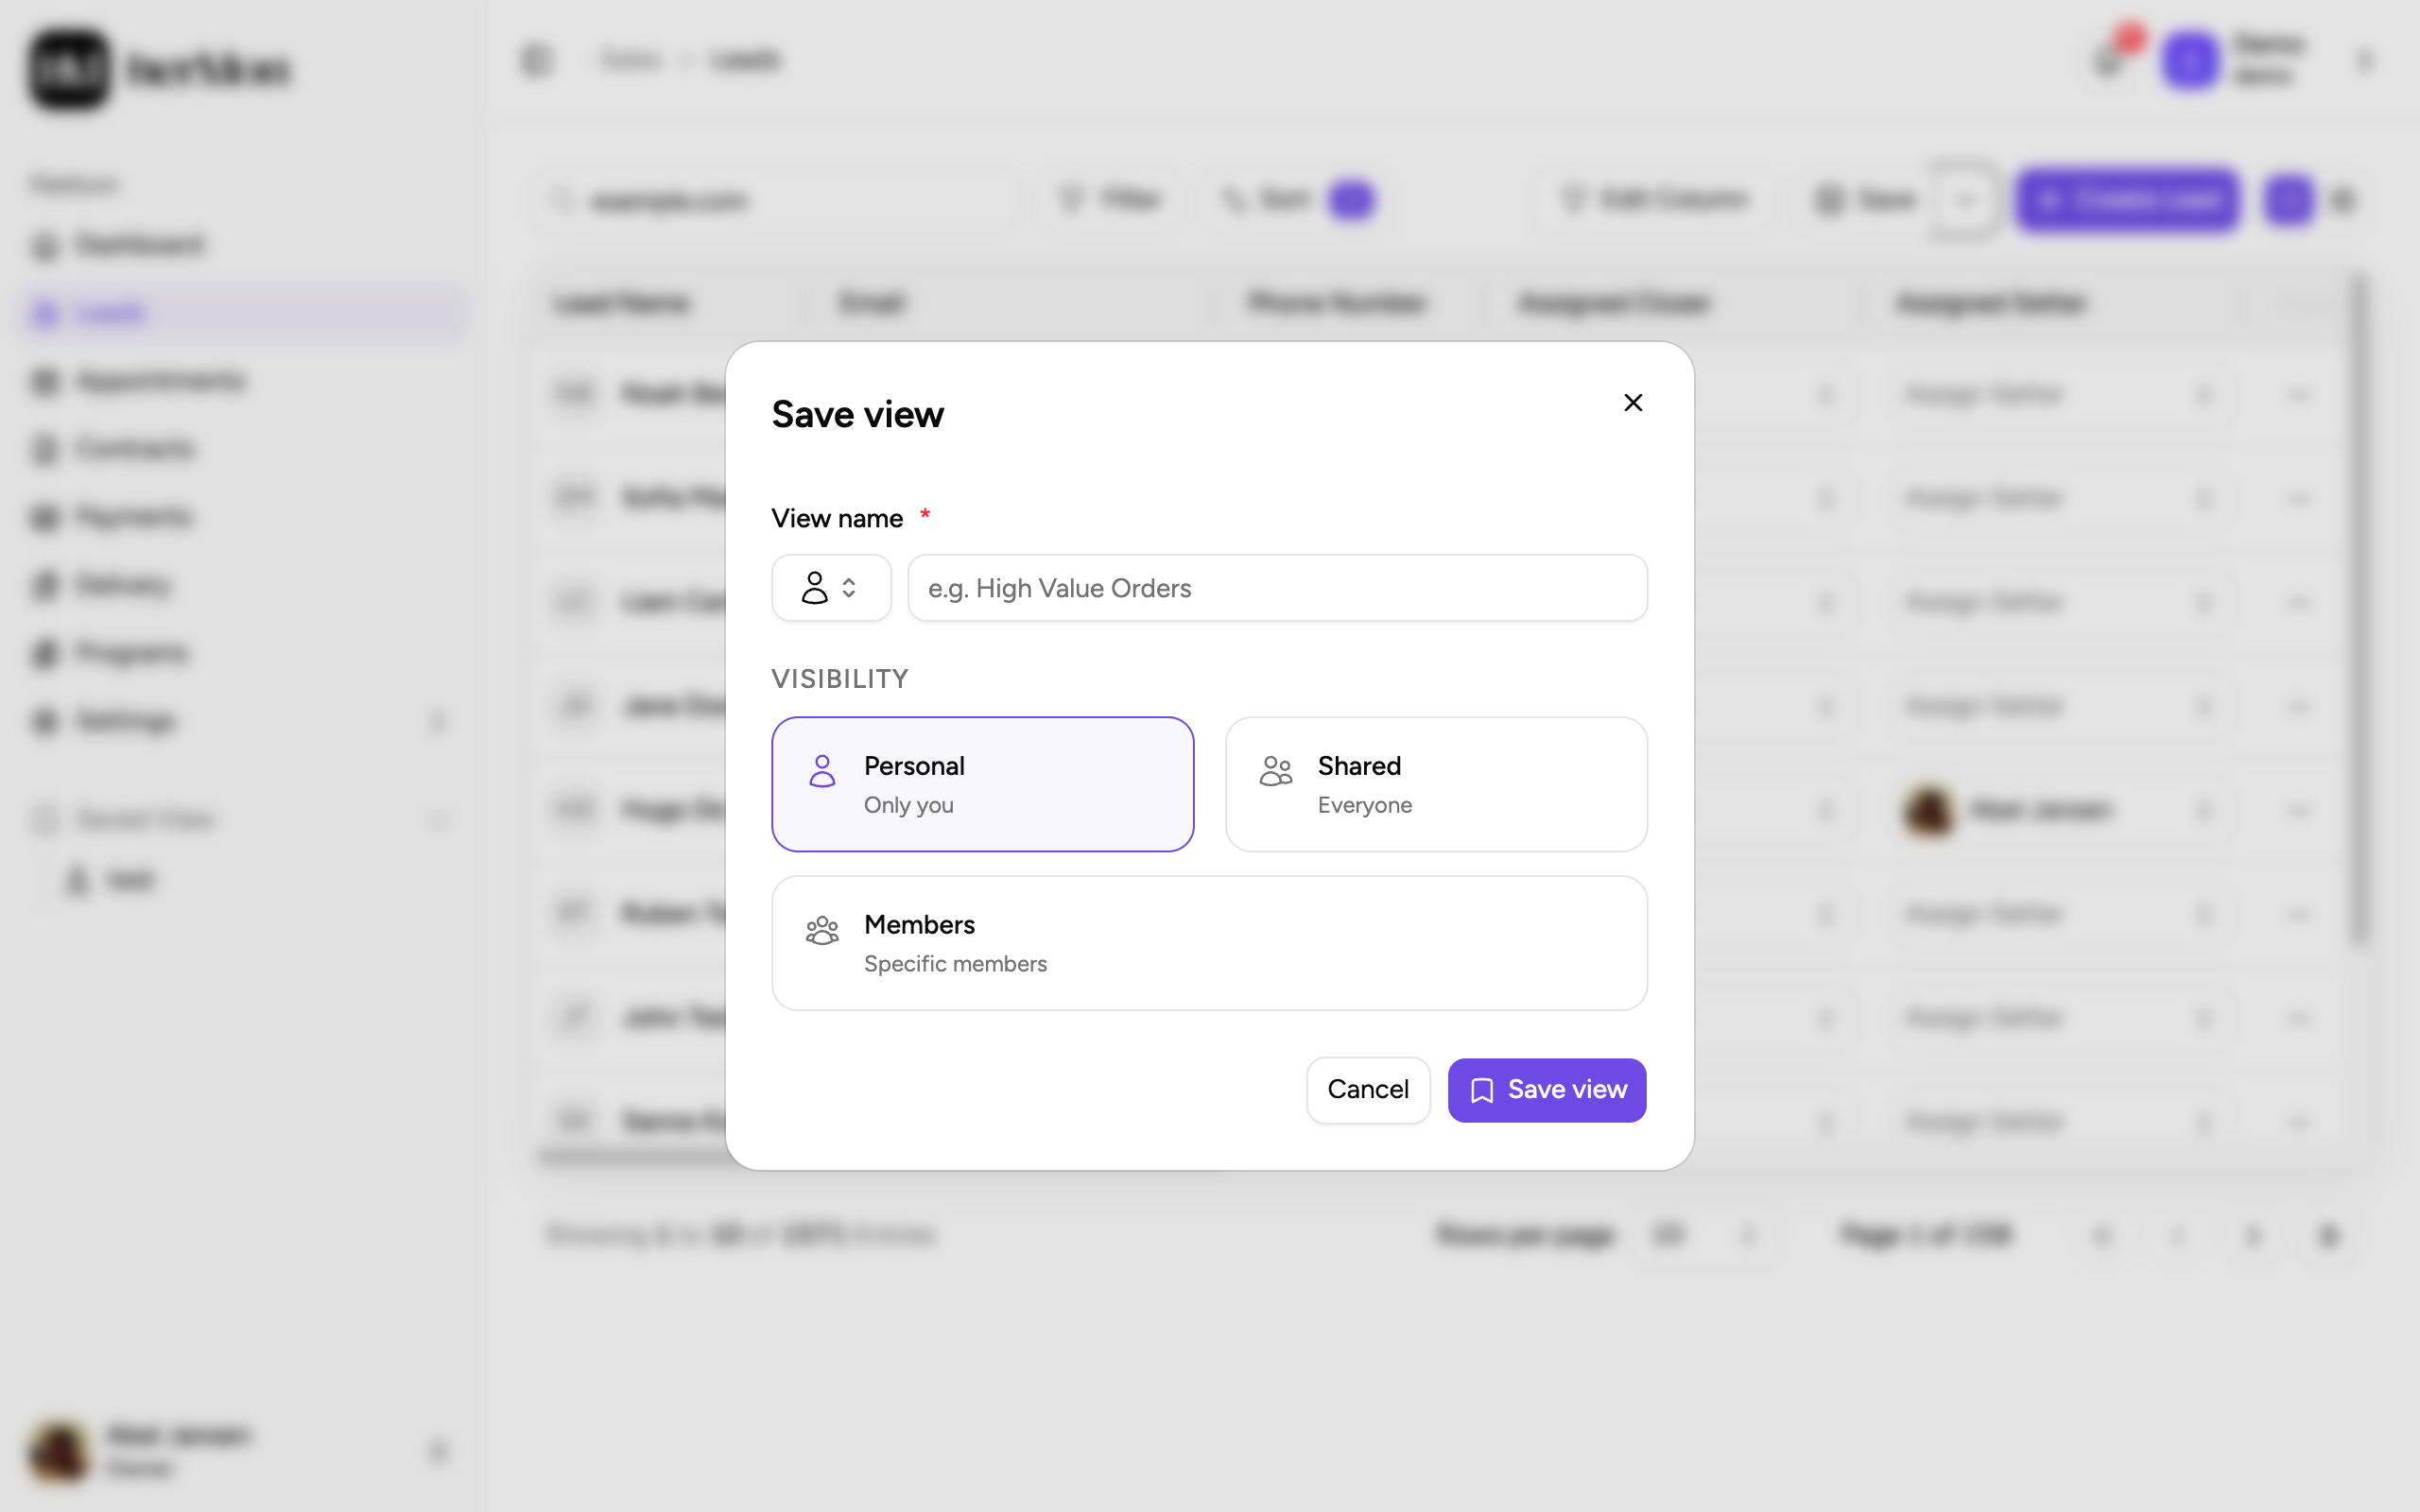
- Personal views are only visible to you, Shared views to everyone in the workspace, and Members views to the team members you pick.
- When you change filters while a view is open, you can save the changes to the view or discard them to go back to the saved version.
Good to know
First Source and Last Source. Both describe where a lead came from. Last Source changes every time the lead opts in again through a tracked source. First Source is set once and stays. Filter on First Source for a stable list, and on Last Source if you want the most recent channel. Only Owners and Sales Managers can change sources by hand.
A touch point without a time is saved for that whole day and shown as a date only.
Removing a touch point asks you to pick a new status for the lead, so no lead is left without a next step or an outcome.
Deleting a lead is only possible for Owners and Sales Managers, from the row menu.
Archiving a team member deletes their saved views. Ask them to recreate important views as shared views owned by someone else first.